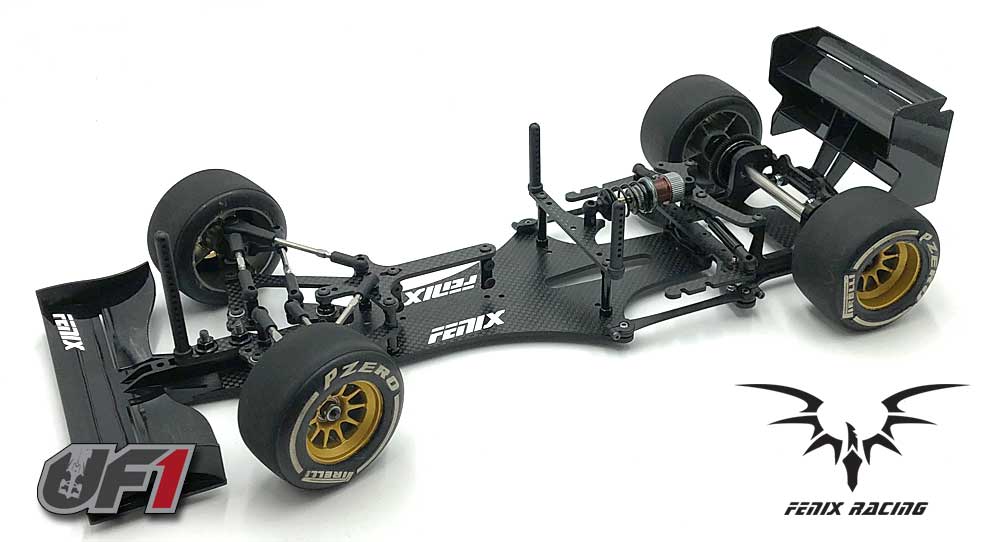
The Mistral “2017” is Fenix Racing’s newest Formula 1 onroad car. It comes loaded with all the go-fast features including a 1/4″ Grade 5 titanium rear axle, titanium turnbuckles, unique, long titanium kingpins that accept a wide range of aftermarket springs, dual-side damper setup, special Fenix center shock and CNC-cut 84T 64P spur gear – and that’s just the short list!
The UF1 was lucky enough to get our hands on one of these wild F1 rides and we’ve provided a complete build here. Before you start, though, you’re going to need a few things – the manual, for one. The kit does not come with one in the box, so we’ve provided a digital copy for you to download prior to the build:
Kit Manual –> Fenix Mistral 2017 Manual
Build Notes:
• The Fenix Mistral 2017 uses multiple carbon fiber parts. To help prevent them from delaminating in a crash, you might consider sealing the edges with CA glue. There is a How To on CompetitionX (Link: How To: Prep and Seal Your Carbon Fiber / Graphite Parts) that shows you how to do this.
• In addition to the standard tools, you’ll want to have some blue threadlocker and diff grease handy. Neither of these comes in the kit but is HIGHLY recommended.
Let’s get to the build!
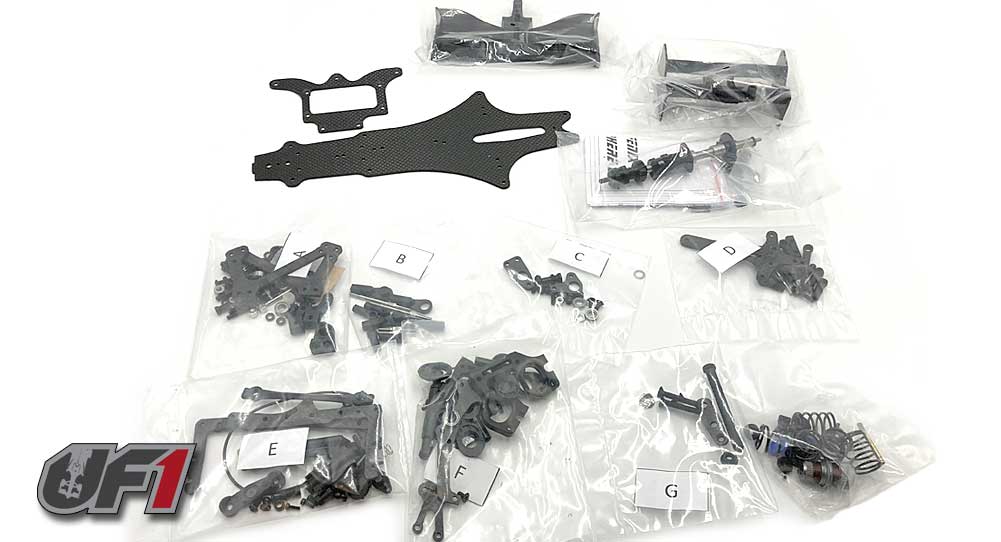
Being a Formula 1 car, there’s not a whole lot of parts that come in the box. Again, no manual is included so make sure you download one using the link above.
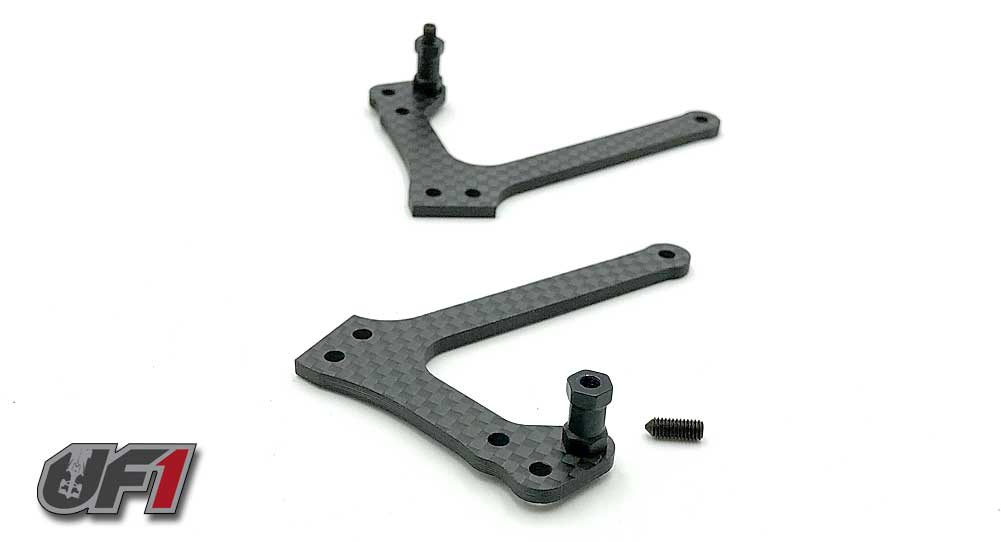
The first thing we are going to do is assemble the front suspension. Make sure you use the shorter of the two-sized standoffs for this step. Note the mounting position. A dab of blue threadlocker is suggested here.
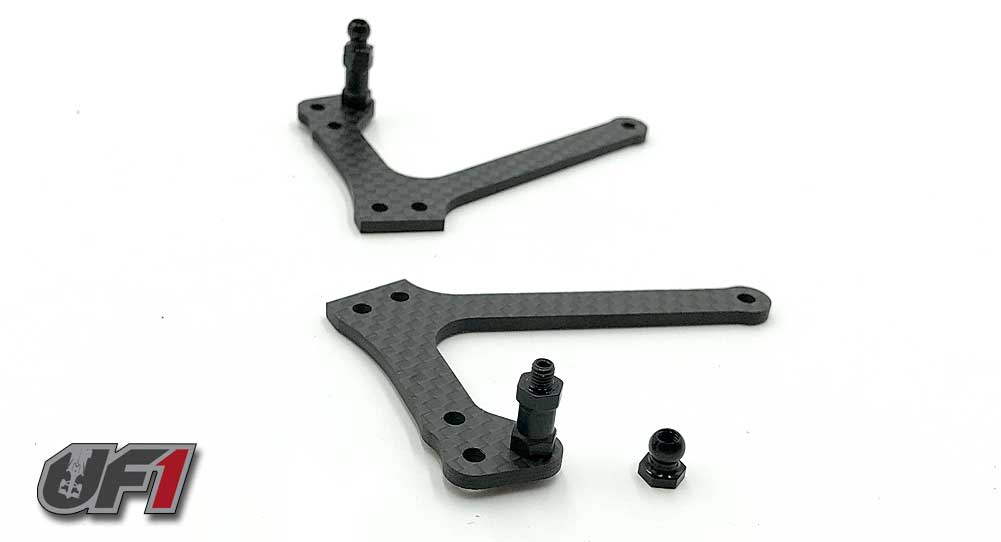
Attach the upper ball links. Blue threadlocker is suggested here as well.

Pop the white pivot balls into the retainers. Note the direction; the ‘shoulder’ should be facing down, opposite the side of the retainer with the countersunk holes.
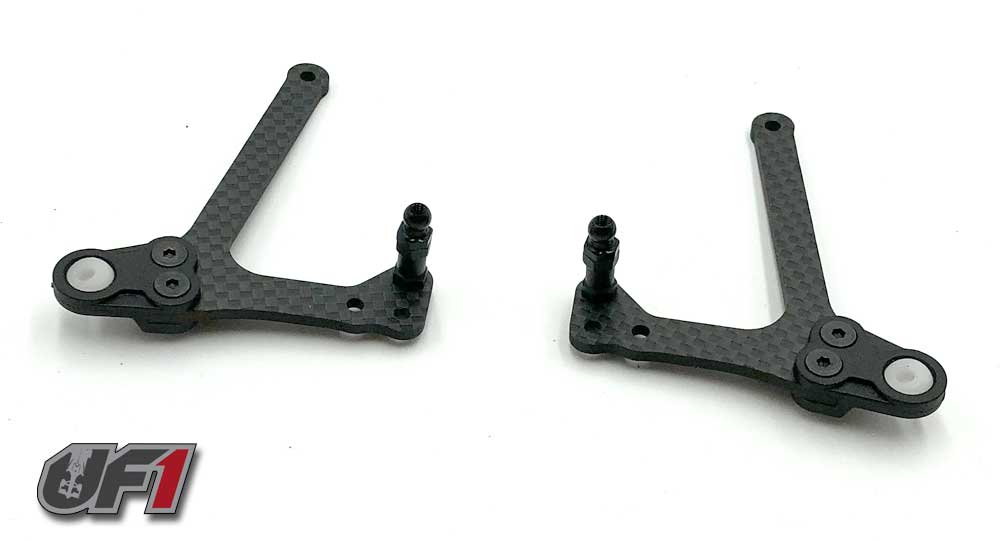
Attach the assemblies from Step 4 onto the carbon arms. Do not overtighten these, just snug them up enough to remove all of the movement in the parts, then maybe a 1/8 turn more.
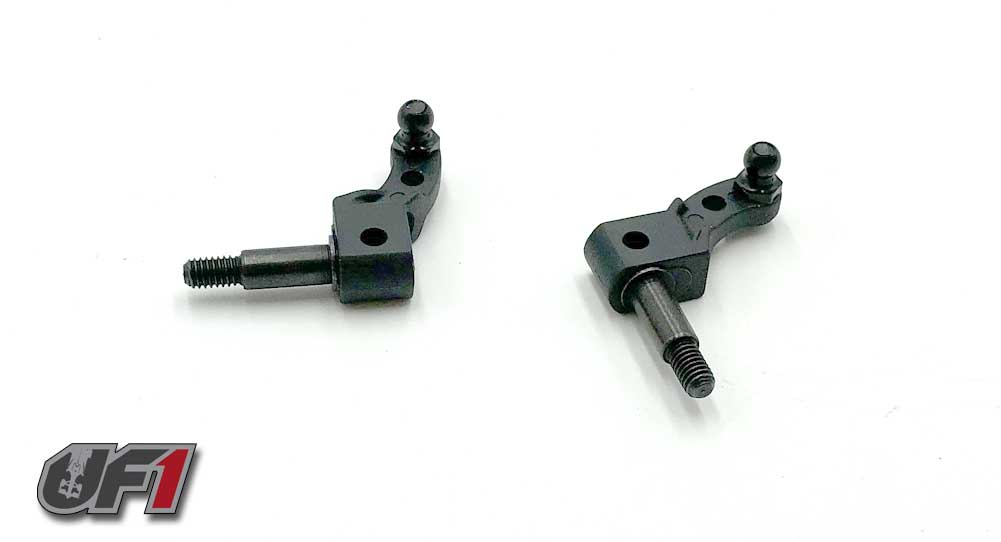
Assemble the steering blocks. They can be built in either inline or trailing – if you’d like more information on the difference, see the tuning guide on CompetitionX (Link: RC Suspension Tuning Guide).
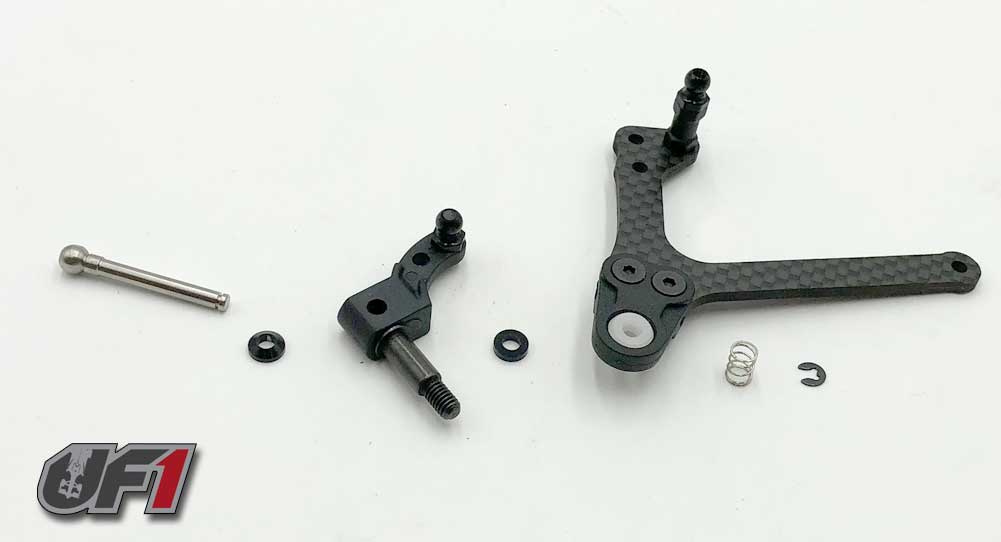
The next step is to attach the steering block to the arm. Slide the beveled spacer onto the long kingpin, then slide that assembly through the steering block. This may require a little massaging – the holes in the plastic block and axle must be PERFECTLY aligned for this to fit.
Once through, slide the spacer on, then through the pivot ball in the arm. Slide on the spring and capture the whole assembly with the teeny, tiny e-clip. Be very careful at this step; you’ll need to compress the spring slightly to get the e-clip on. Did I mention it’s a VERY small e-clip and a bit difficult to work with – especially if you have sausagey fingers?? While assembling both sides, I had the spring launch itself into oblivion multiple times. Luckily I was able to find both but, you know, you’ve been warned.
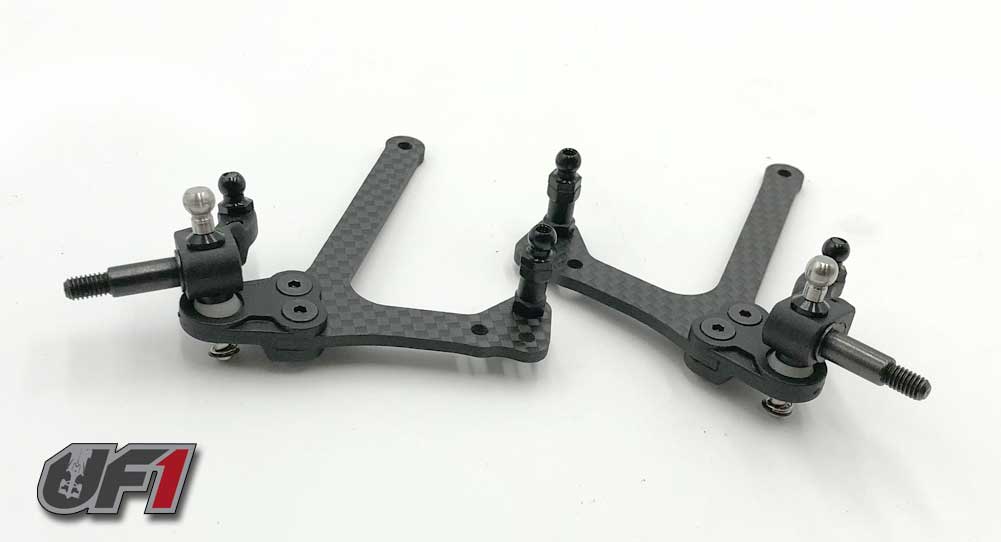
Here’s what your assemblies should look like. Hopefully the e-clip installation was a little less painful than mine was.
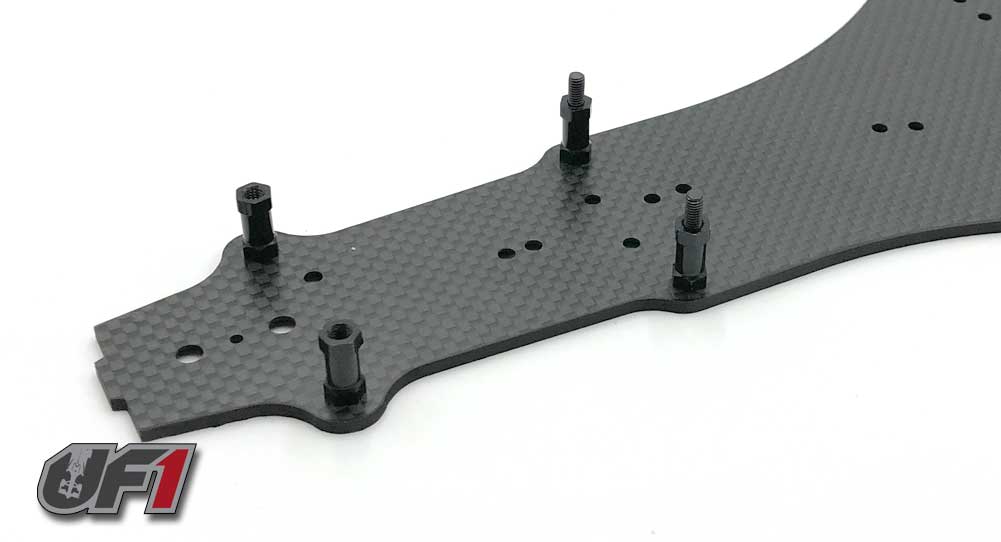
Attach the taller standoffs to the chassis. Blue threadlocker is suggested here.
Attach the left and right arms to the standoffs – use the short standoffs at the back and don’t forget the washers up front. You know – blue threadlocker here as well.
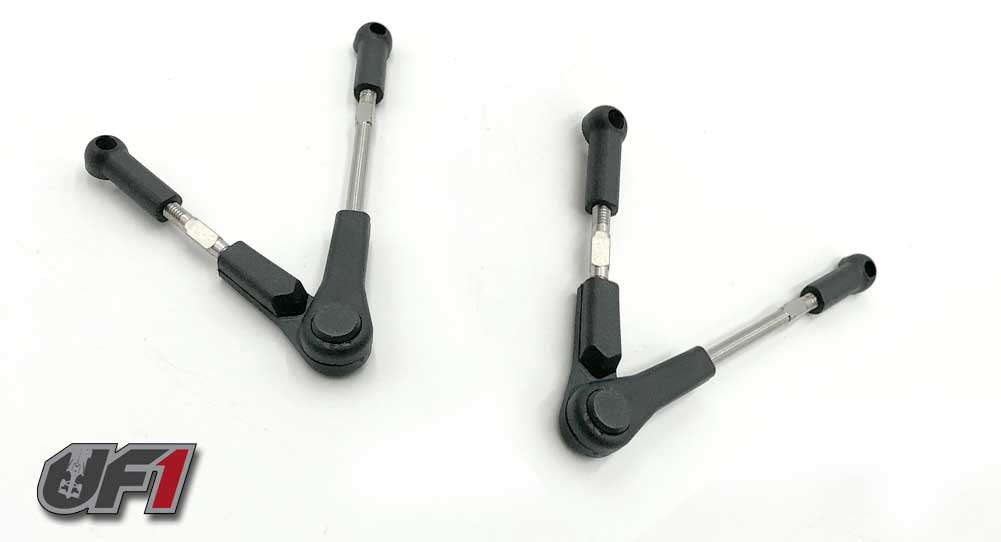
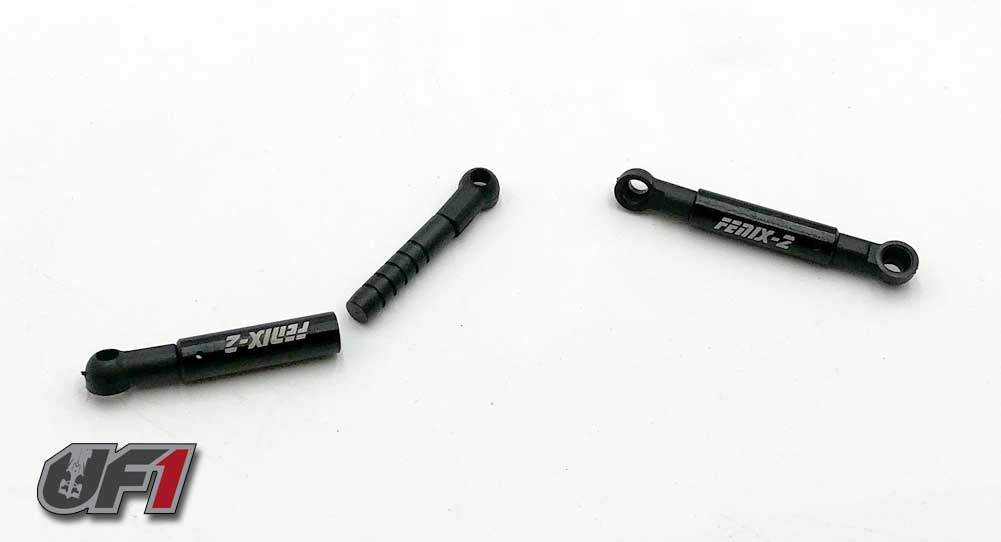
Assemble a pair of V-links. PAY CLOSE ATTENTION to the assembly here, making sure you thread the correct links into the right ball cups. Easy to get confused.
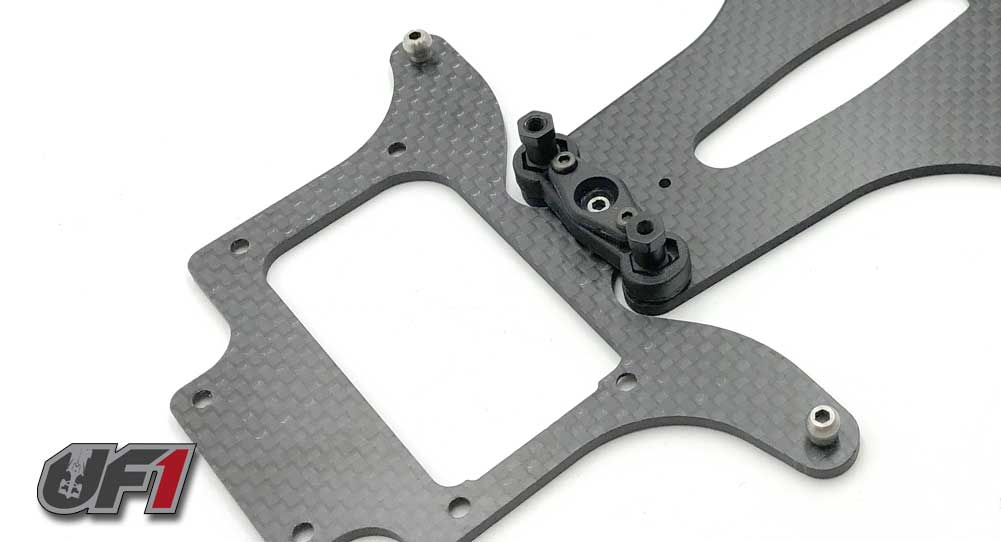
The Mistral 2017 offers two types of steering setups; on the chassis and upside down (or floating). I opted for the floating steering setup simply because it looks cool – the manual gives you directions for both.
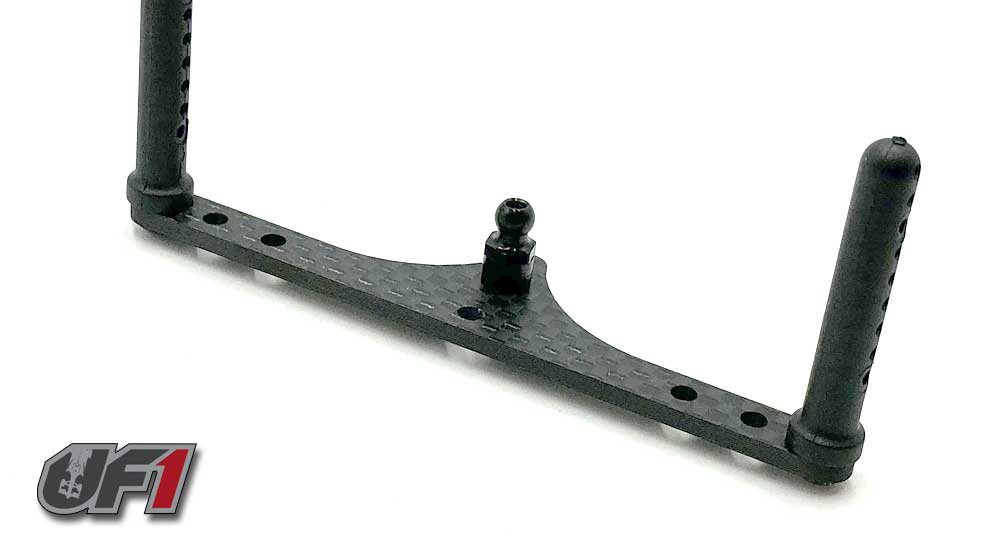
That being said, here is the assembled steering post for the floating setup.
Attach the ball ends to the upper deck. Blue threadlocker here.

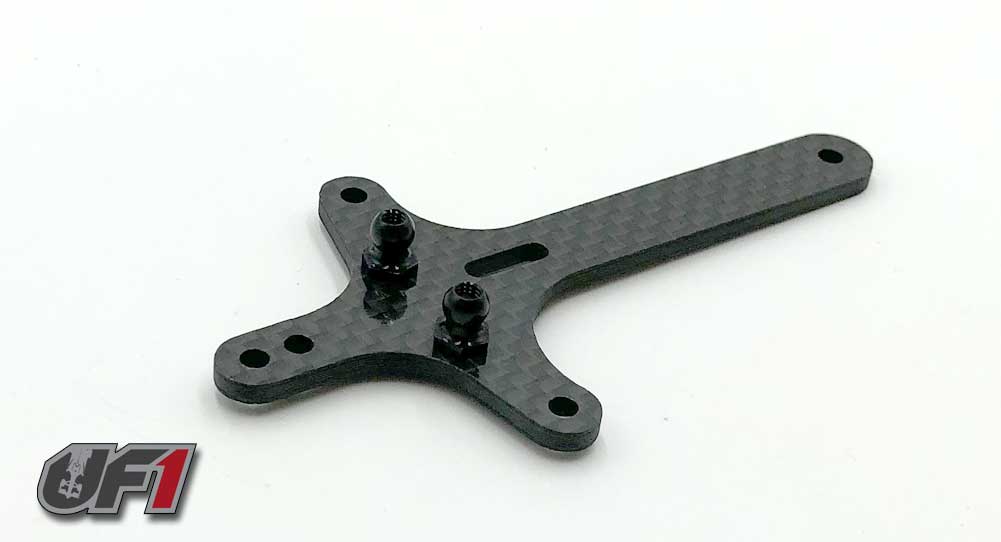
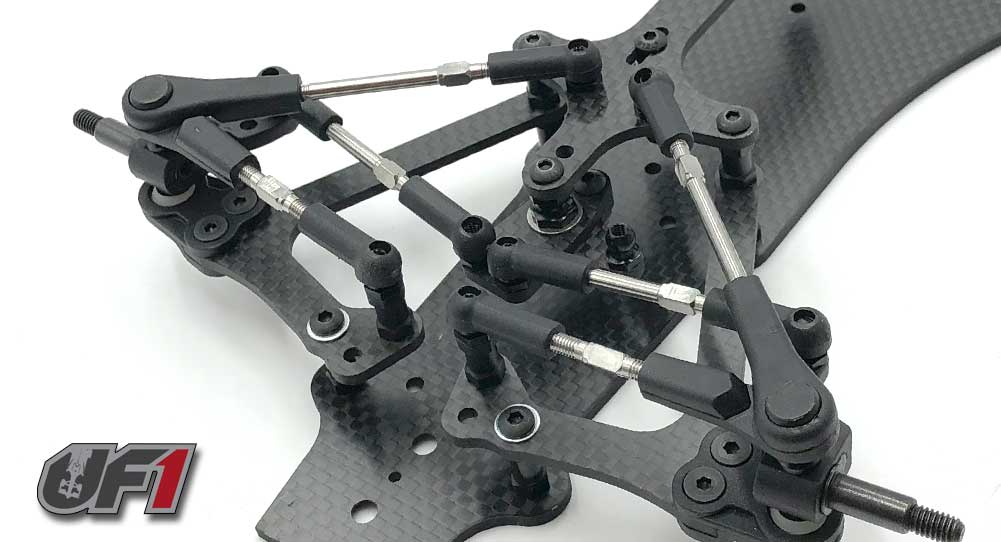
Attach the steering assembly and servo mounts to the upper deck, using blue threadlocker on both. This is what your final top deck should look like (if you are building the Mistral 2017 with the floating steering setup).
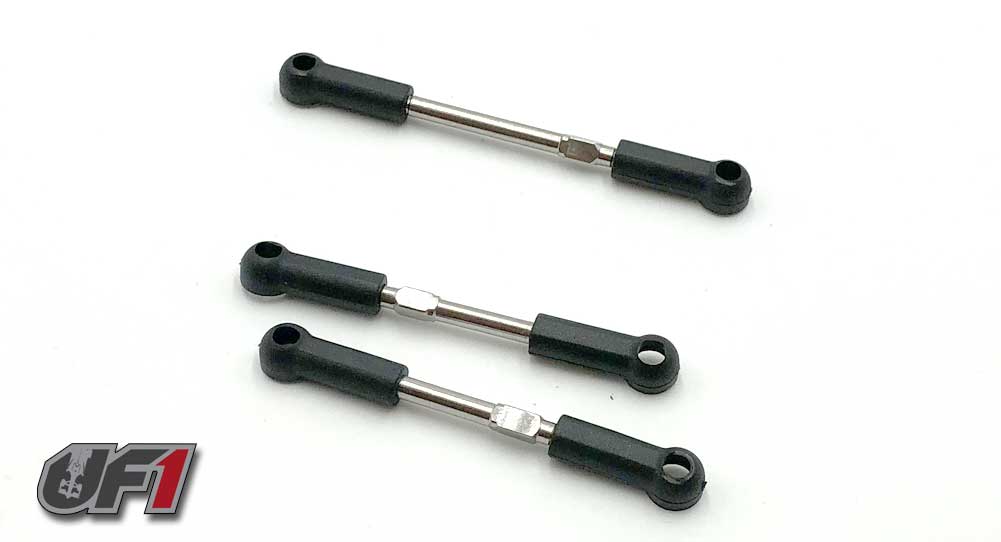
Build 3 links; two steering and one drag link.
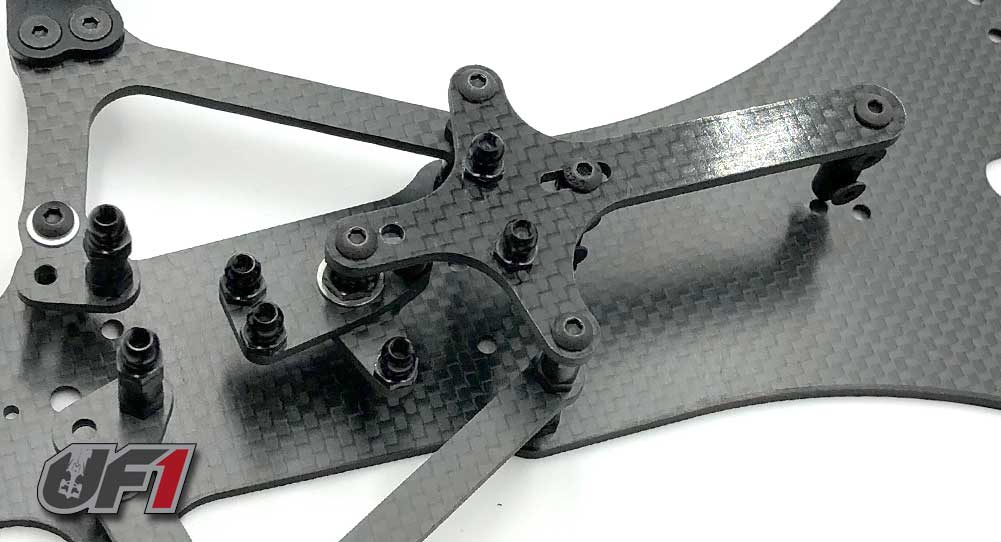
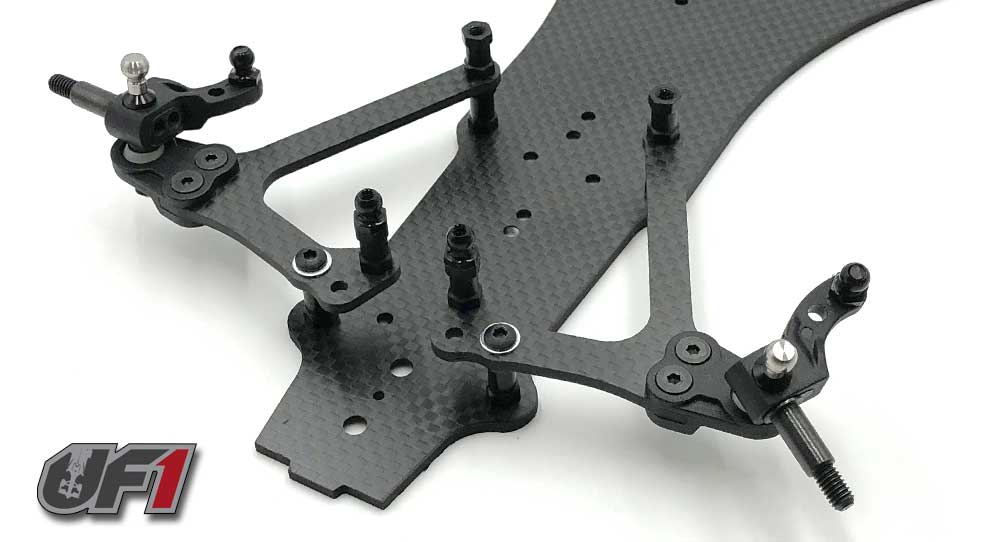
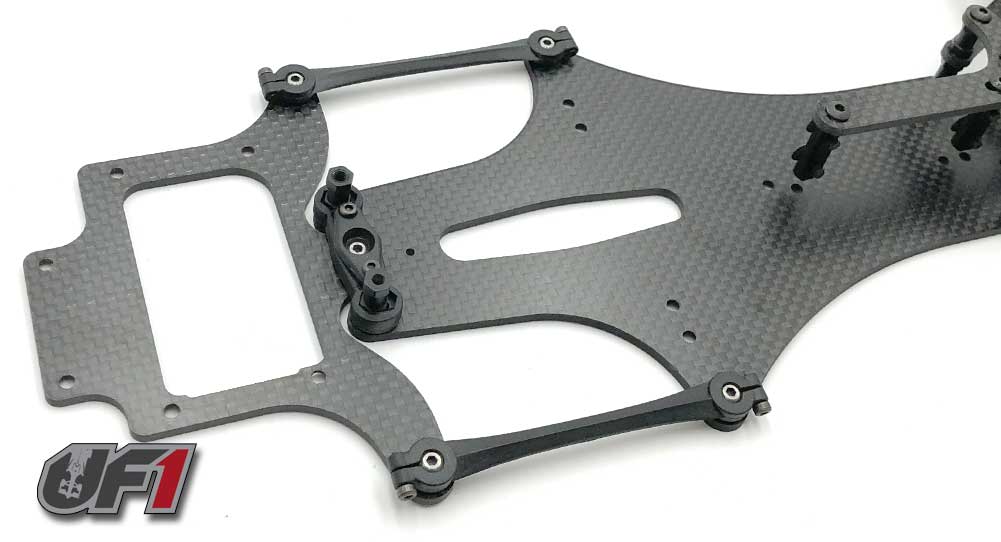
Attach the top deck assembly to the chassis. Blue threadlocker is suggested.
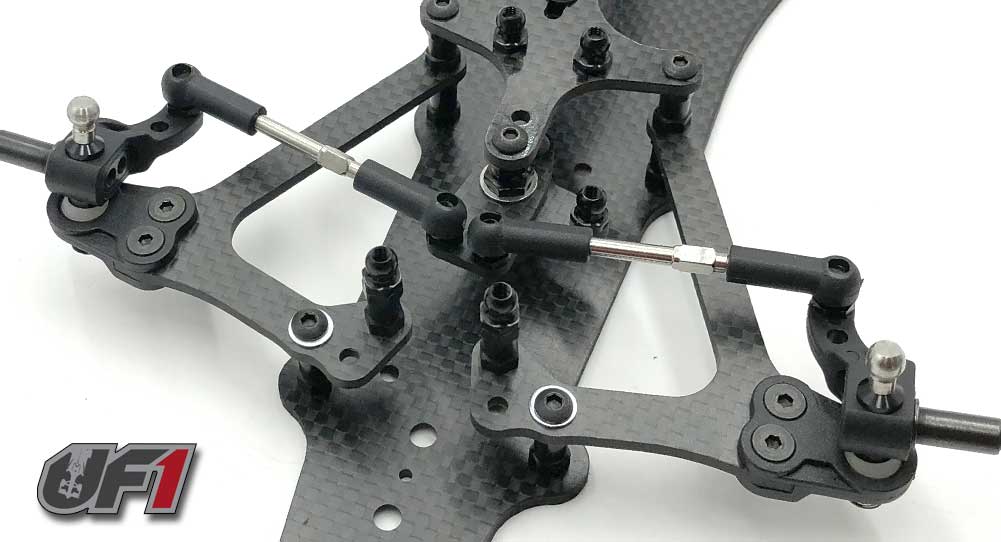
Attach the left and right steering turnbuckles…
…followed by the camber/caster V-links.
At this time you may want to check everything; swivel the steering, compress the suspension, etc. Just make sure everything moves freely with no binding.
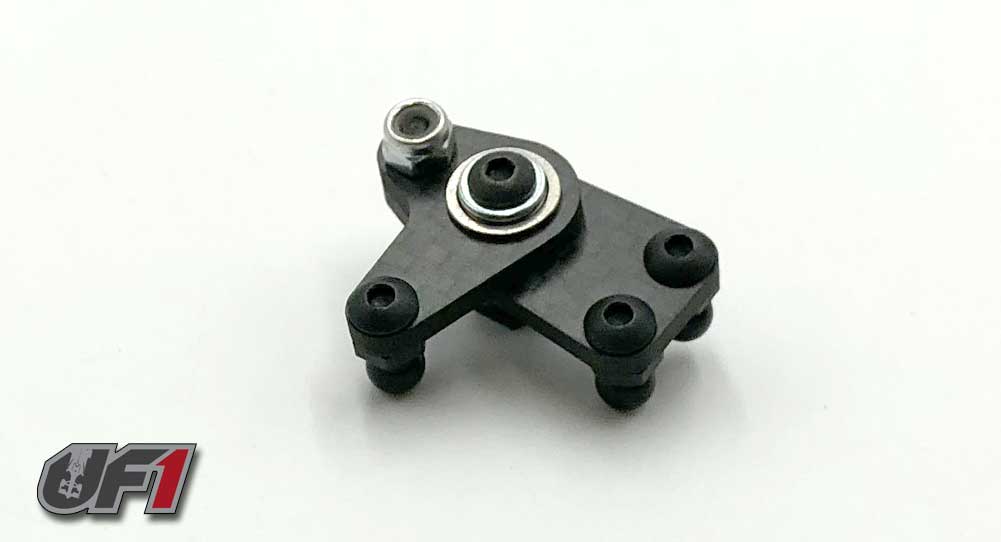
On to the rear suspension; the first step is to assemble the ‘football’. Drop a chrome ball into the mount (ball-shoulder down) and capture it with the cap. Do not overtighten. The ball inside should move around freely. A drop of shock oil will also help keep the ball from sticking.
Attach the football assembly to the main chassis deck. Don’t worry about the position of the aluminum mounts just yet; we’ll adjust that in the next step.
Using the M3x6mm screw, attach the lower rear pod plate to the ball in the football. Now you can adjust the ‘gap’ between the main chassis deck and lower rear pod plate by sliding the aluminum mounts from Step 20 back and forth. If you haven’t yet, add a dab of blue threadlocker and tighten everything down.
Add the 4 silver balls to the main deck and lower rear pod plate.
Pop the side links into place and use the M2x6mm screws to secure the links. Do not overtighten; just snug them down. These links need to have free movement.
If the rear pod has a ‘notchy’ movement, you may need to adjust the mount points from Step 21 (shorten them up slightly).
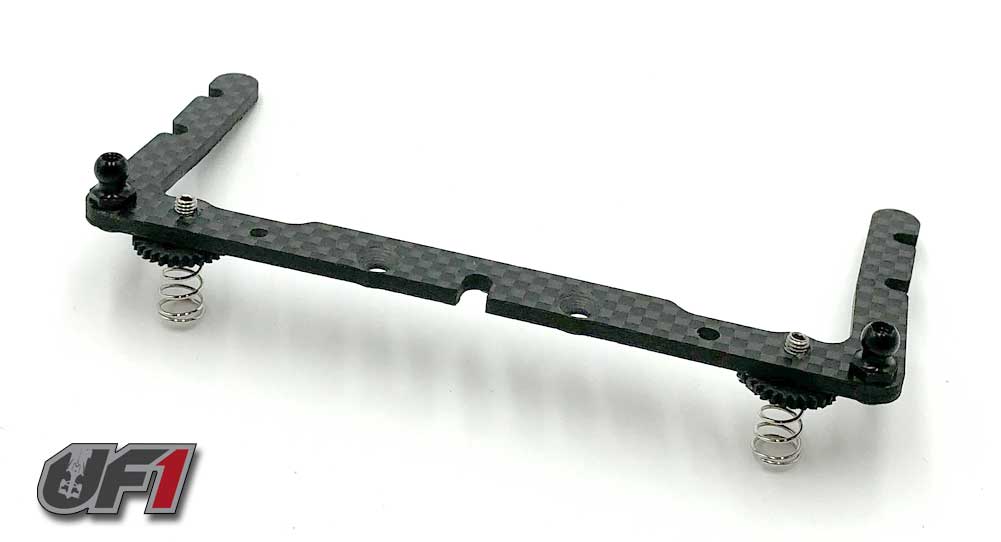
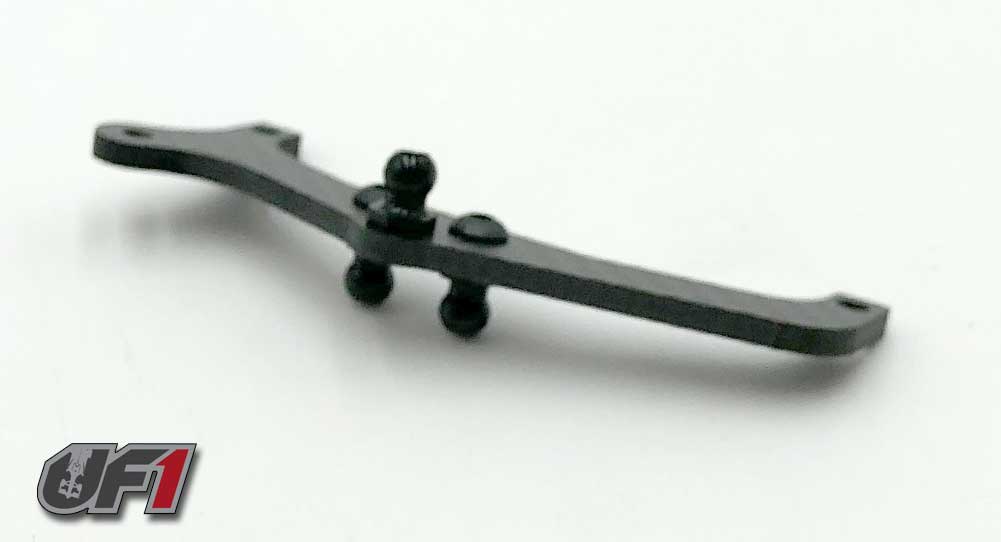
Assemble the side-spring plate.
I found that both the damper balls and side-spring set screw holes to be undersized, so threading into them caused the carbon to delaminate slightly. Before you man-handle the screws and ruin the carbon part, use a little bit of Chapstick (or similar) to lubricate the holes. This will make it easier to screw in. I don’t recommend opening the holes up more; doing that could keep the screws from threading in and render the carbon piece useless.
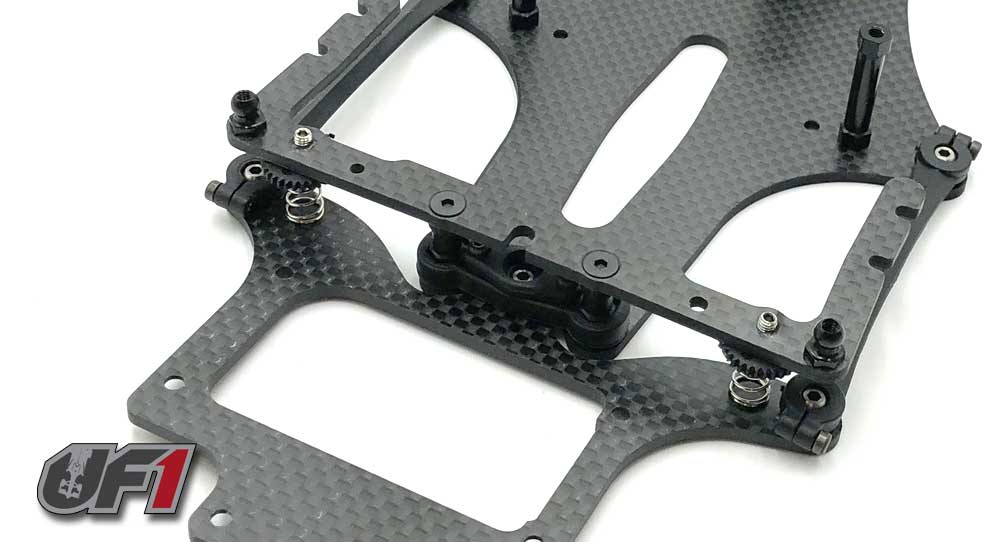
Attach the carbon side-spring plate to the chassis, using a dab of blue threadlocker to help keep the screws from backing out.
Assemble the rear body mount/center shock mount. Blue threadlocker on the center shock mount is suggested.
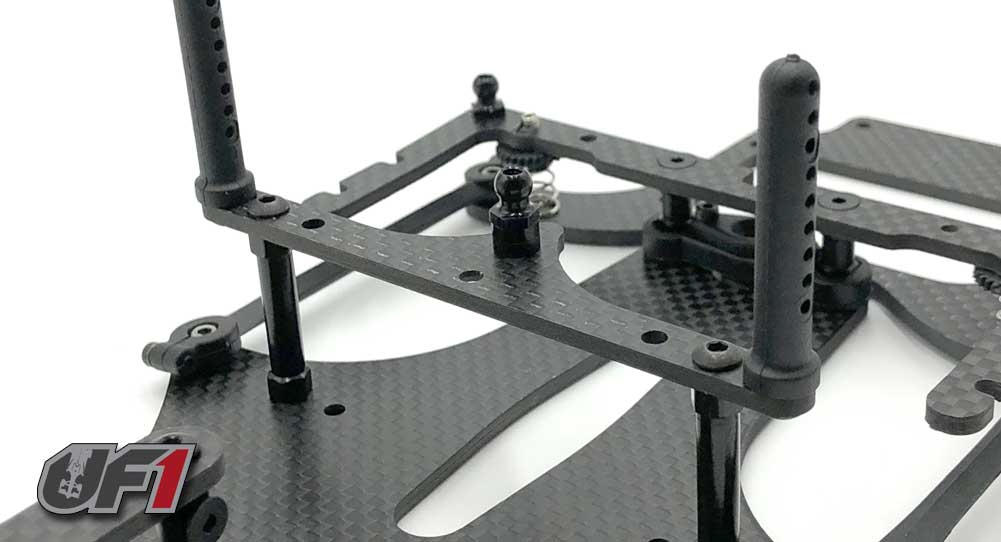
Install the tall standoffs and attach the mount from Step 26. Yes, blue threadlocker here as well.
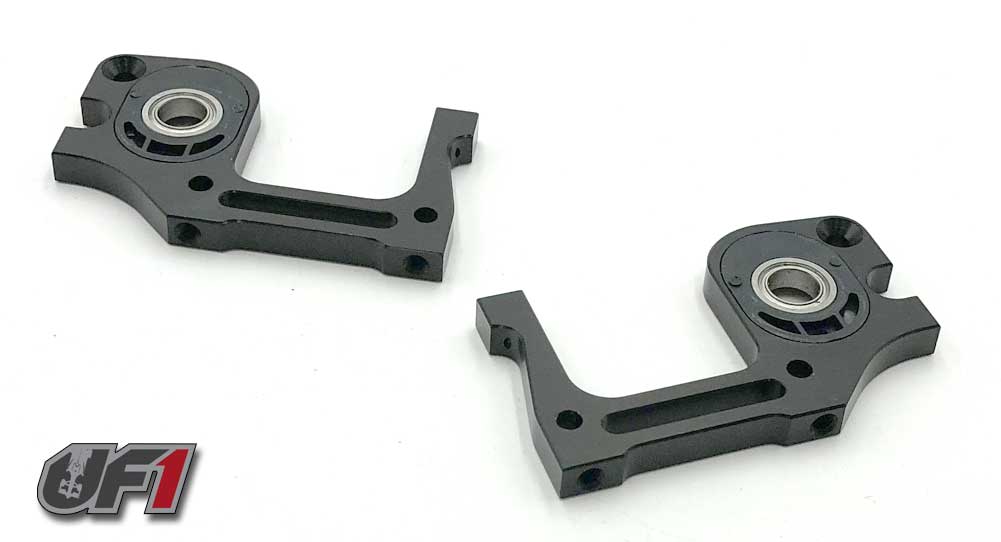
Motor pod time! Press the bearings into the inserts; you’ll need to experiment with these inserts as they adjust the ride height of the rear axle. I used the 0 insert for this build.
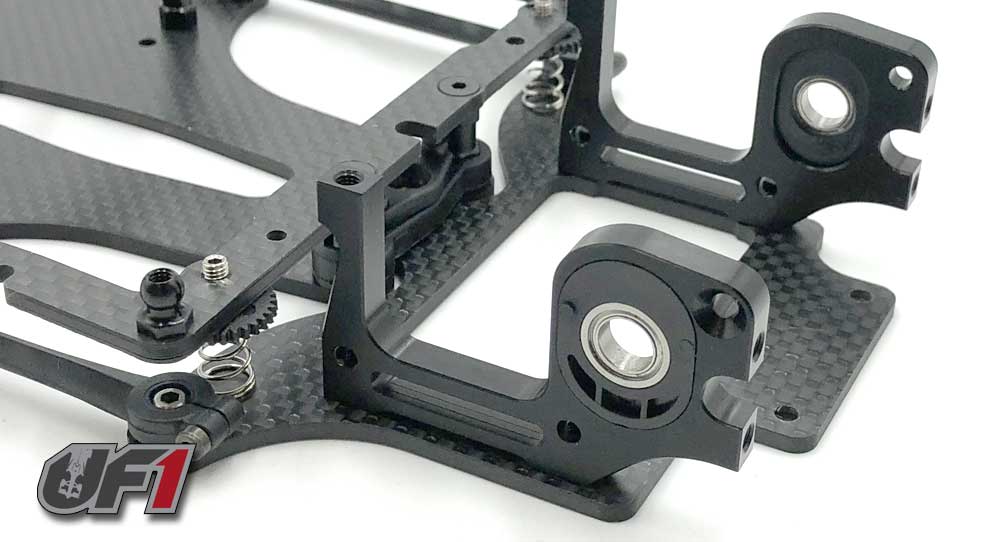
Attach the aluminum rear pod sides to the lower rear pod plate. Blue. Threadlocker.
Assemble the carbon top brace/center shock/side damper mounting plate. Yes, blue threadlocker; yes blurry pic. Not sure what happened there but you get the idea.
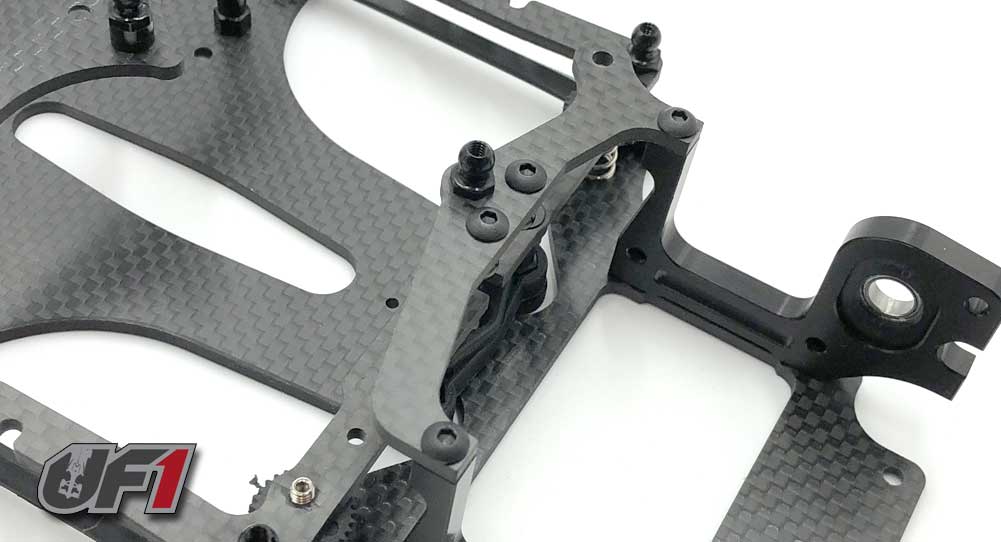
Attach the carbon top brace/center shock/side damper mounting plate to the chassis. Once again, blue threadlocker is suggested here.
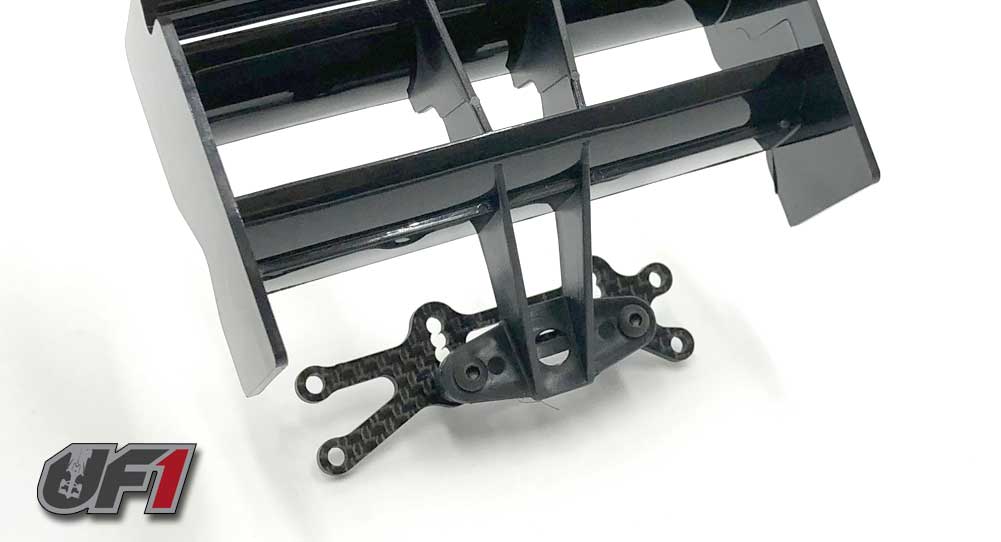
Attach the rear wing to the carbon wing mount. You can choose from multiple wing heights, I used the lowest one possible. Note the orientation of the carbon wing mount.
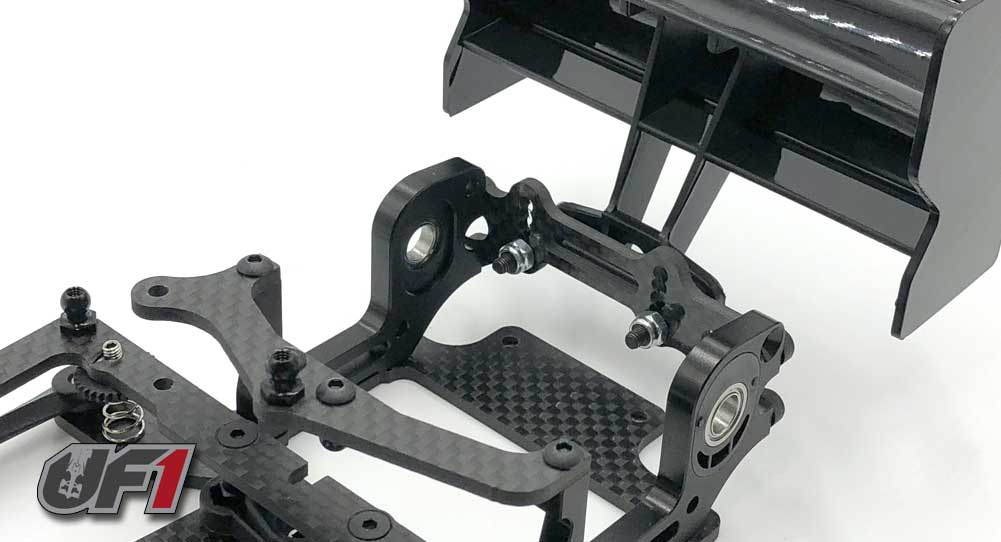
Attach the rear wing mount assembly to the rear pod. Blue threadlocker here as well.
Assemble the pair of side dampers. You can add a variety of different fluids to these to help slow them down or, as I did here, leave them dry. Experiment, experiment, experiment.
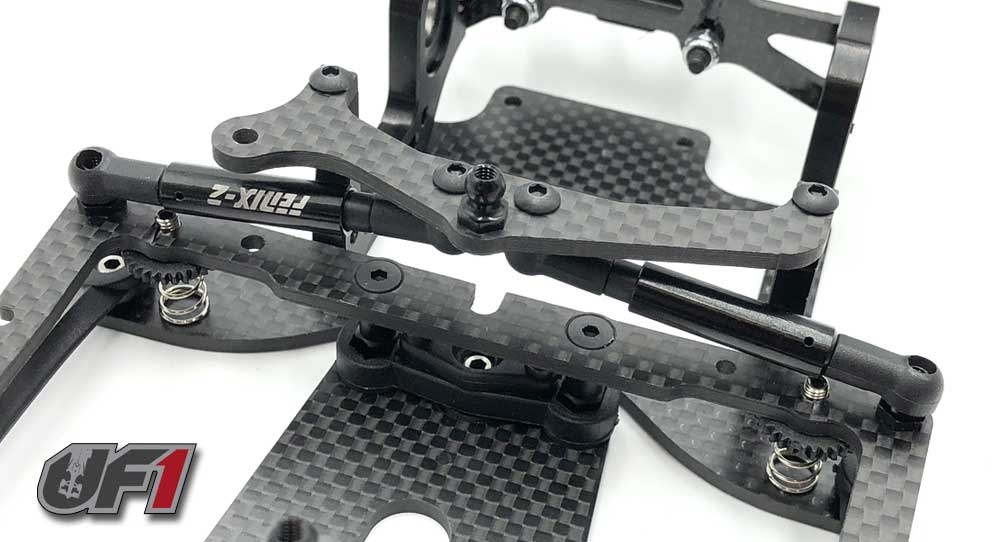
Attach the side dampers to the chassis.
The next build stage is the center shock. Fenix has supplied a variety of shock pistons that will help you tune the Mistral 2017 to different track conditions. I used the 2-hole piston to start – bet you can’t tell though from the blurry blob in the pic. Sorry for that.
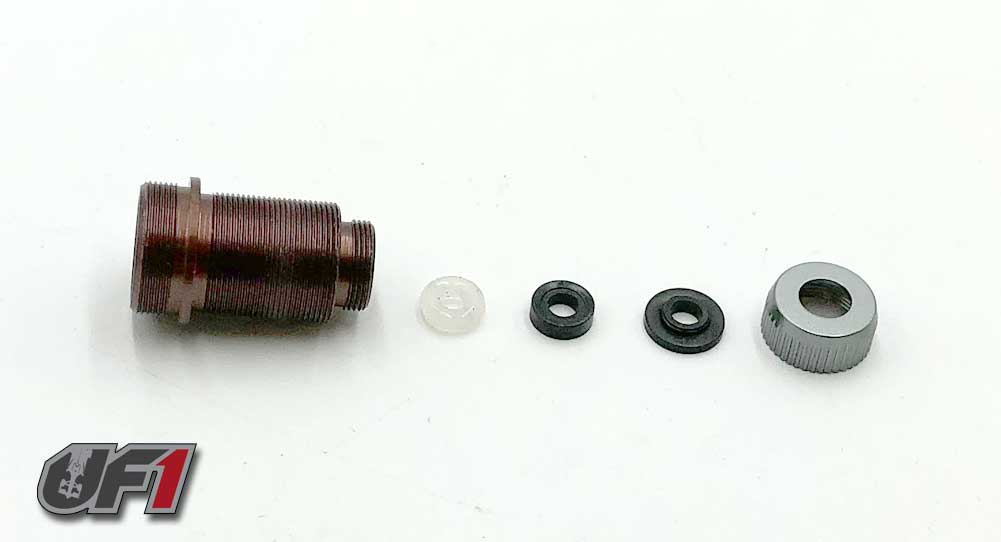
Build the lower shock cartridge; o-ring, spacer, shaft guide and aluminum cap. Before installing the aluminum cap, send a drop of oil down into the assembly to help the shaft feed through easier.
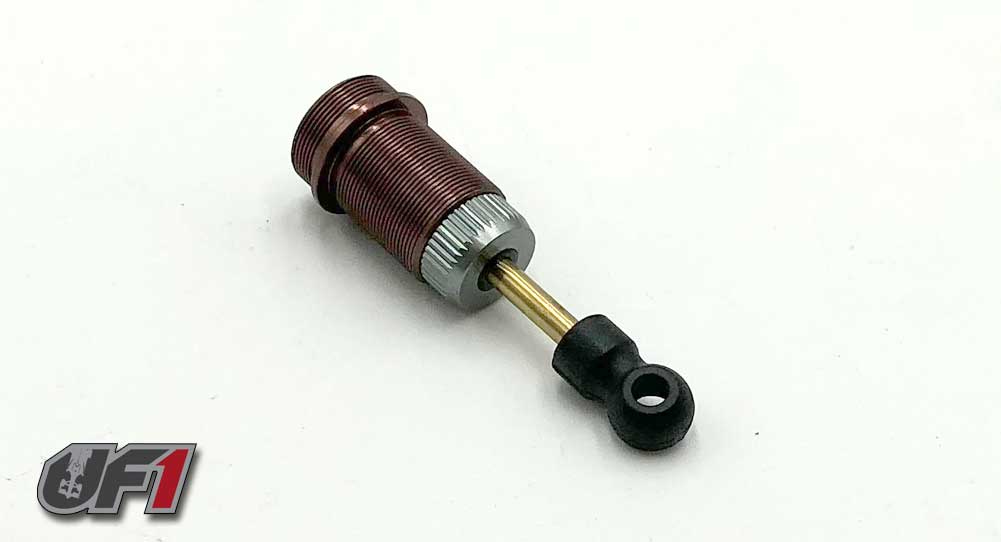
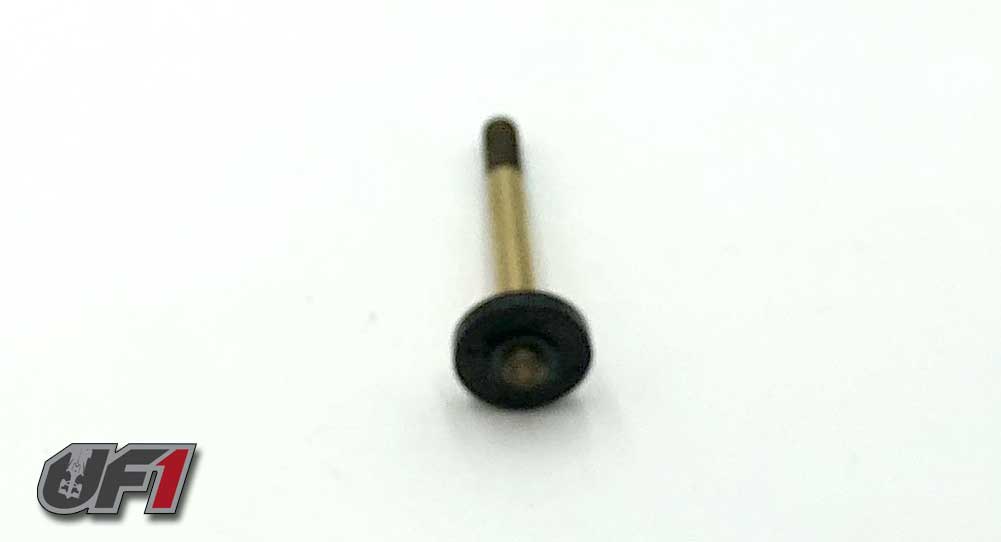
Shaft installed with lower rod ball end.
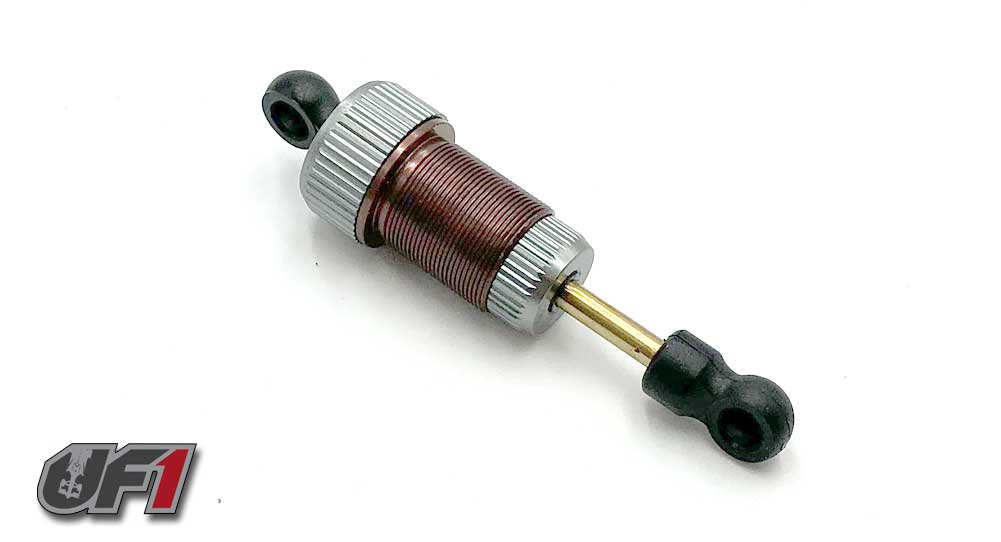
Fill the shock with oil (will be dependent on your track), bleed (using the cap bladder) and install the aluminum cap. The shock should be silky smooth thanks to the internal bladder.
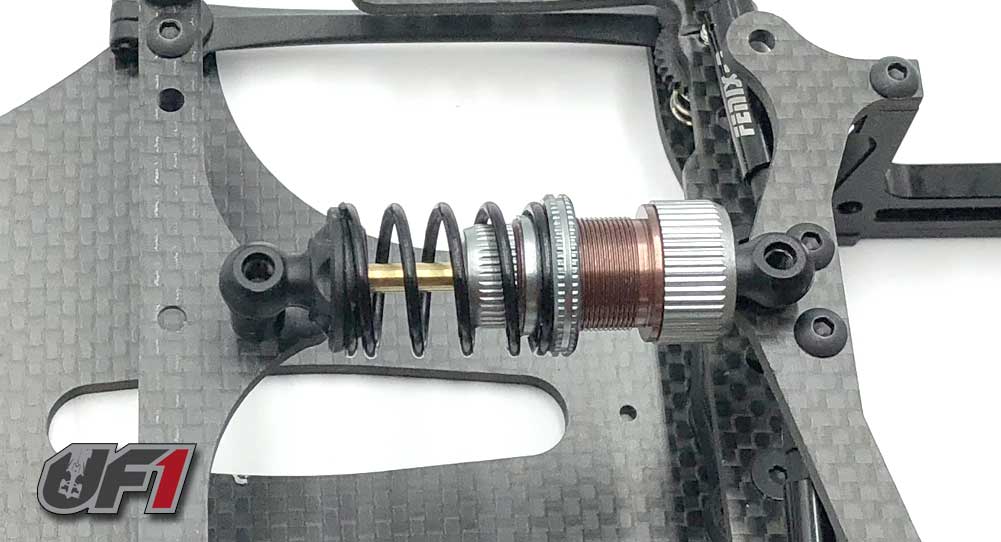
Install the threaded collar, spring and lower spring retainer, then pop the shock onto the shock mounts. You can adjust the collar when your build is complete.
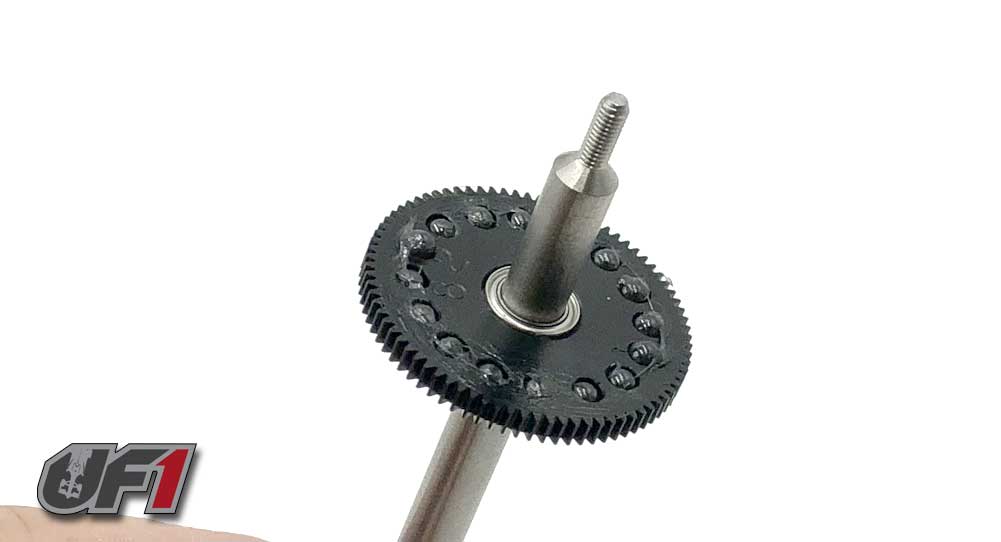
Almost done – time for the rear axle. Feed a bearing onto the rear axle followed by a differential ring. The ring should ‘key’ to the flat spots on the retaining ring. Slide the CNC spur gear into place, fill each hole with diff grease and a diff ball. You can evenly smudge any overflow grease around a bit.
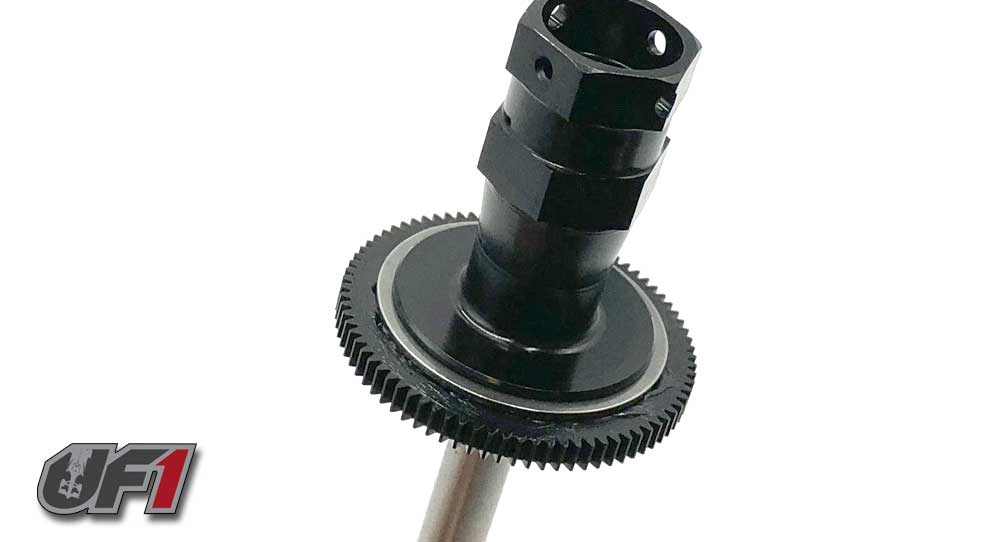
Key the other diff ring to the aluminum output part (using grease to keep it in place), then slide that assembly onto the rear axle.
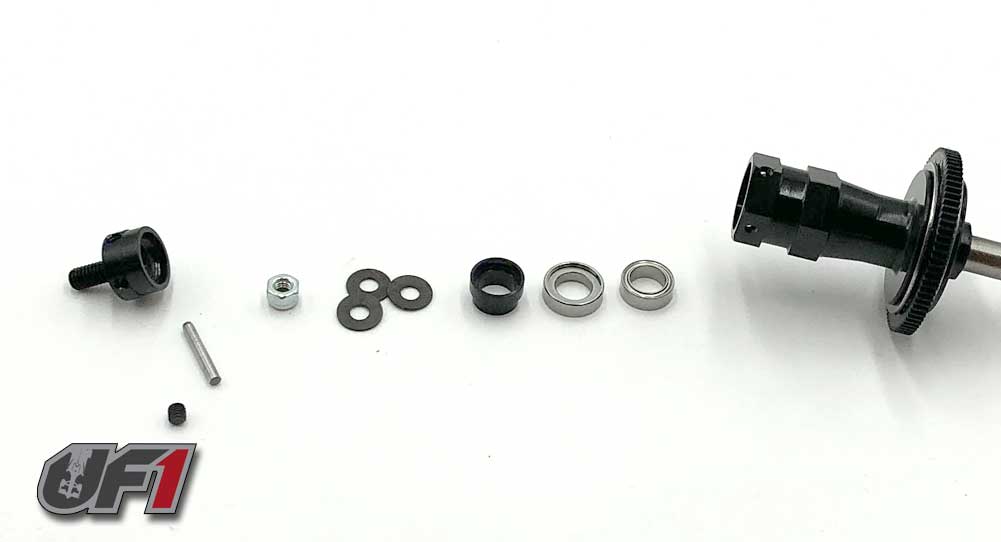
The final assembly parts are as follows; bearing, silver retainer, black bevel-washer retainer, 3 bevel washers (see instructions for bevel washer directions) and locknut. You’ll want to tighten the locknut down to the point where the spur gear is extremely hard to turn when holding the left and rear tires.
Finally, insert the grub screw into the axle cap and tighten until it’s flush to the outside of the cap. Slide the cap into the axle, press the silver pin through one of the ‘other’ holes in the axle cap and use the grub screw to capture the silver pin.
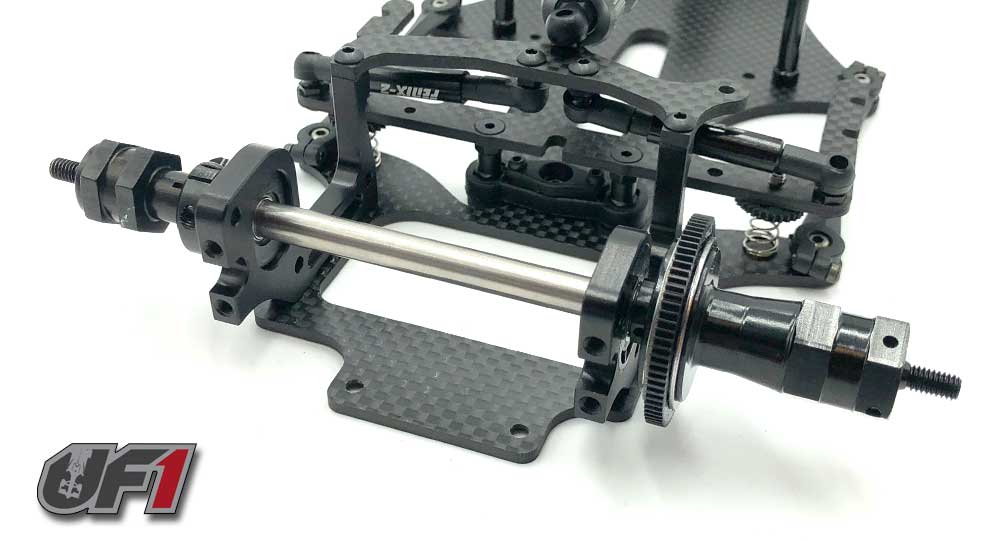
Now slide the axle assembly into the rear pod and secure it using the driver-side aluminum axle cap. You’ll want to leave a teeny gap when clamping down the driver-side cap; there should be about a 1/2mm-ish amount of side-to-side play.
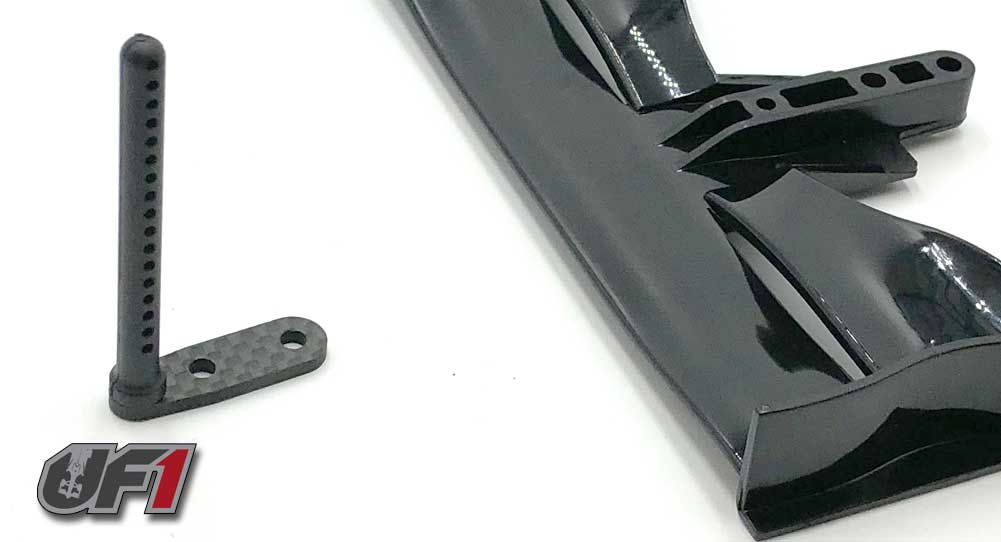
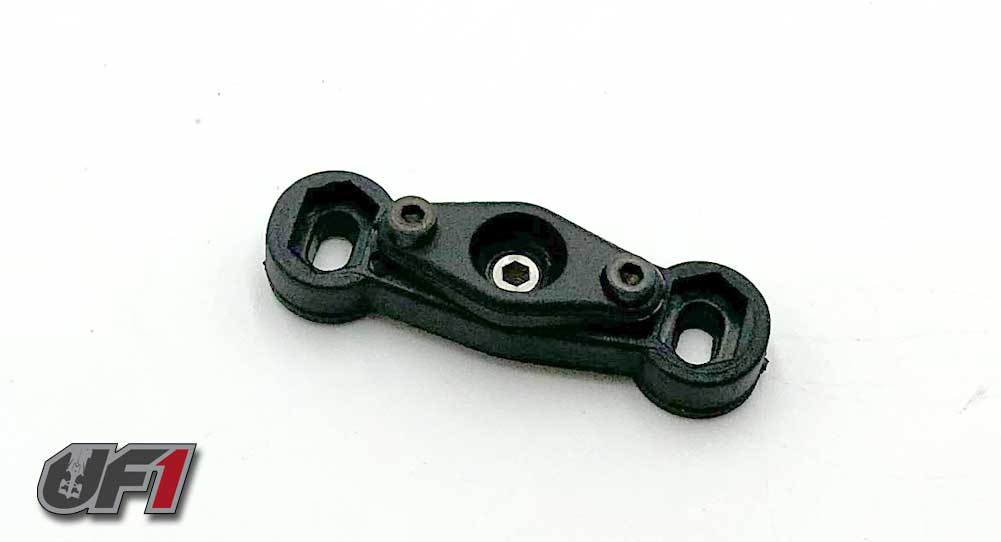
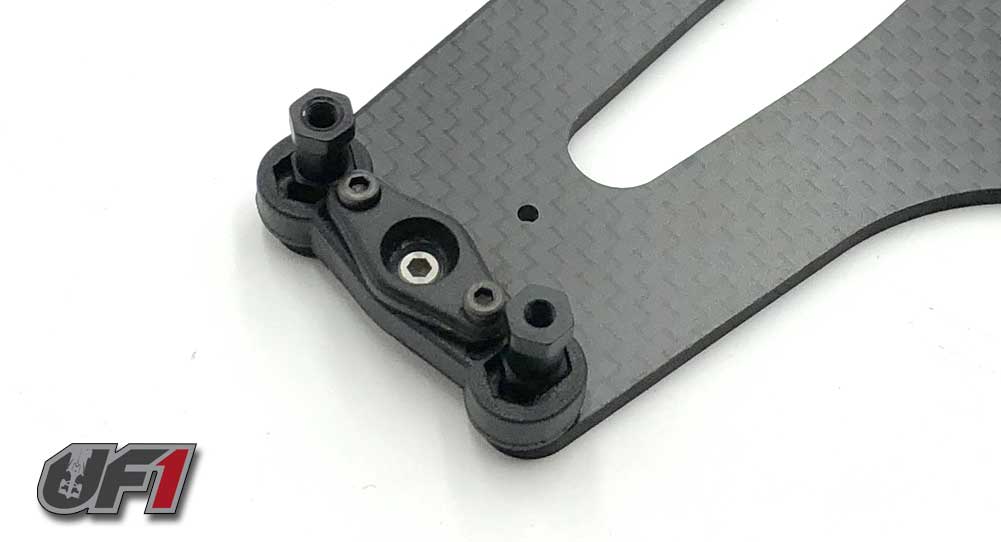
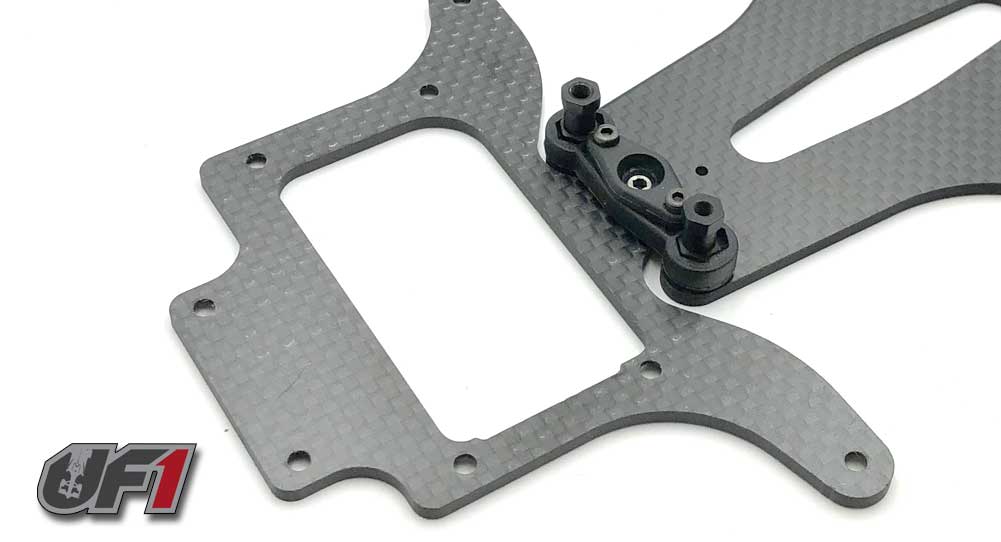
The final step is to attach the front wing. Attach the front body mount to the carbon part…
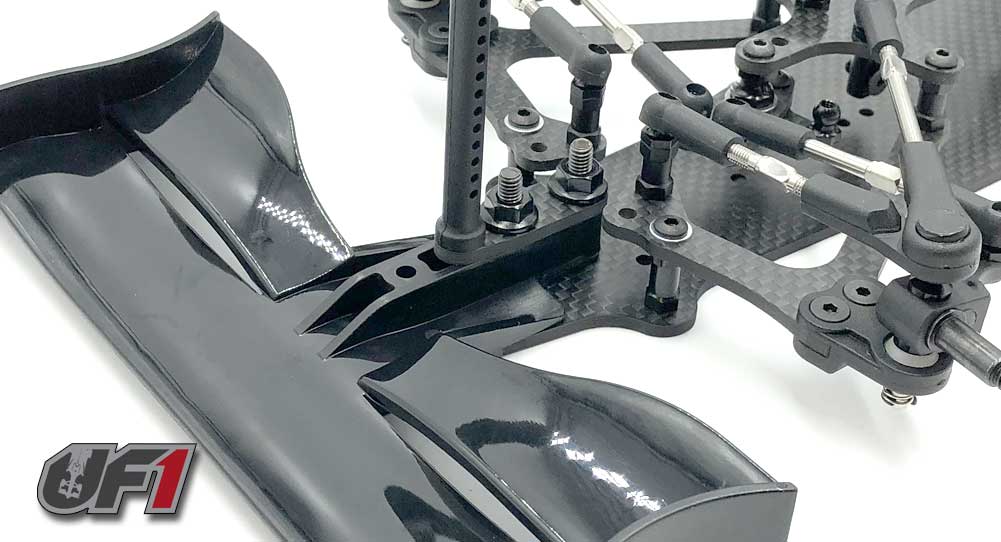
…and mount that to the front of the main chassis. Tighten everything down and you’re all set!
There ya go – a full build of the Fenix Mistral 2017 Formula 1 car. All that’s left is to choose your tires, install your electronics, get that bad-ass body mounted and come join us in the UF1!!!