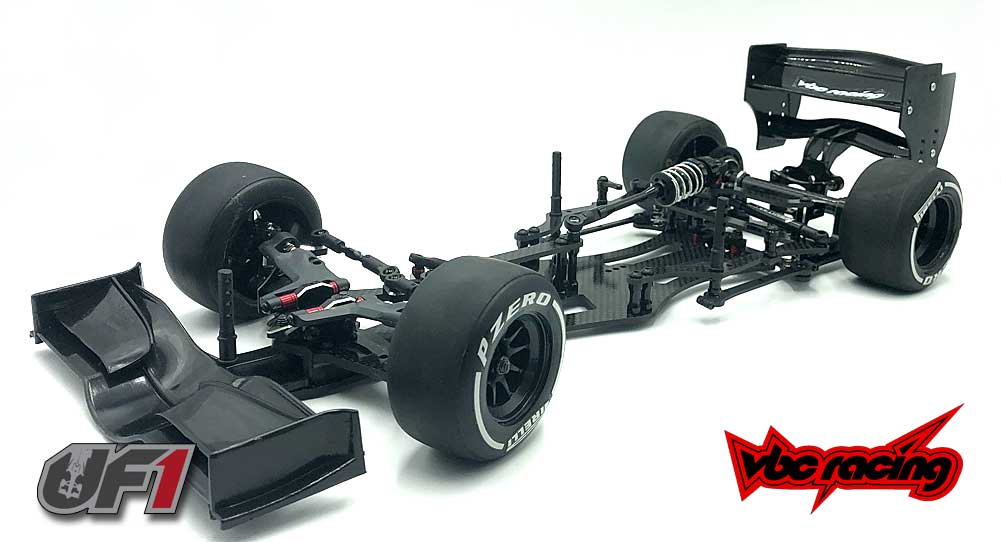
The VBC Racing FX18 Lightning has hit the F1 market with some steam, mainly because of it’s interesting take on the F1 platform. Highly tunable front end, new side link setup, optimal rear pod pivot design and lots of carbon fiber all add to the beauty and desire this car brings to the scale Formula 1 arena.
VBC was kind enough to send one over for display at the UF1 events. But, before we can show it off, we have to build it! We’ve included a step-by-step build of this car with notes on the process.
Build Notes:
• One of the biggest issues I have with the FX18 is the fact is doesn’t come with ANY bearings; no front axle bearings, no diff bearings … none. There’s not even plastic or Oilite ones – you have to purchase these separately! This is quite odd for a kit of this caliber, but thankfully it’s not that huge an extra expense (unless, of course, you go full ceramic). I made my way over to https://www.fasteddybearings.com/ and picked up a full set.
• The VBC FX18 Lightning includes multiple carbon fiber parts. To help prevent them from delaminating in a crash, we suggest sealing the edges with CA glue. There is a How To on CompetitionX (Link: How To: Prep and Seal Your Carbon Fiber / Graphite Parts) that shows you how to do this.
• In addition to the standard tools, you’ll want to have some blue threadlocker and diff grease handy.
Let’s get to the build!
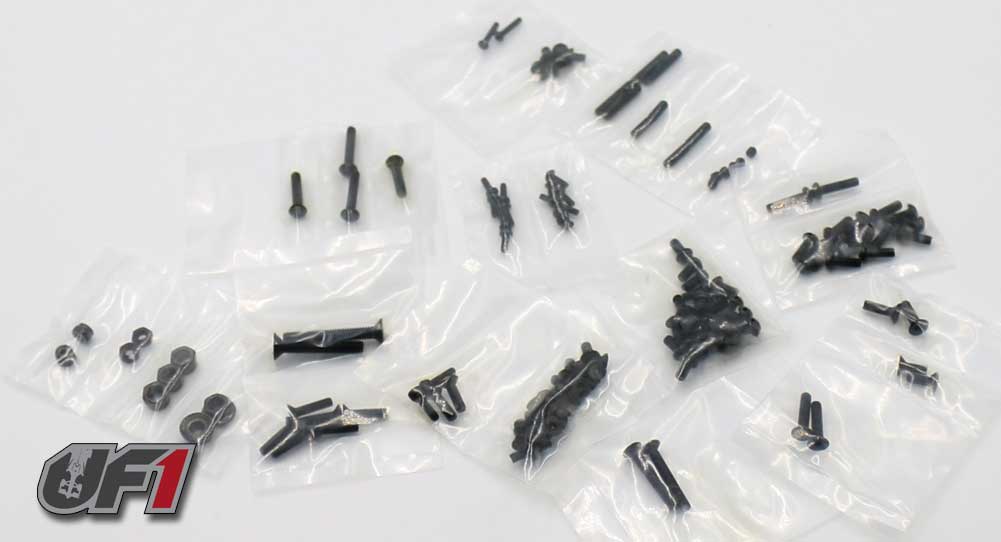
One of the cool features that VBC does is shrinkwrap all the ‘like’ screws together instead of just jumbling them in one big bag. This helps out alot when it comes to building, making it much easier to find the right length screws you need. Thought we’d open up this build with a shot of the screw bags. Good stuff.
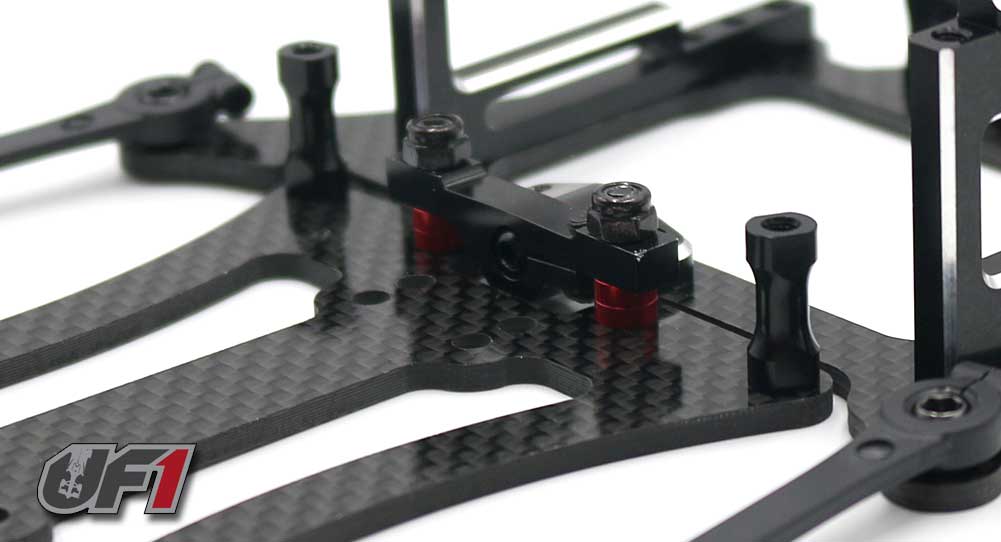
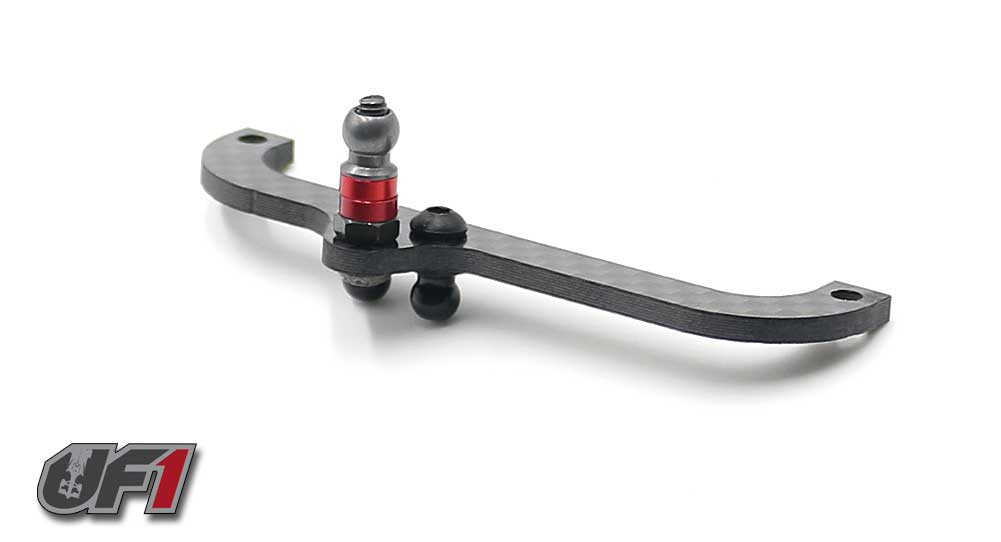
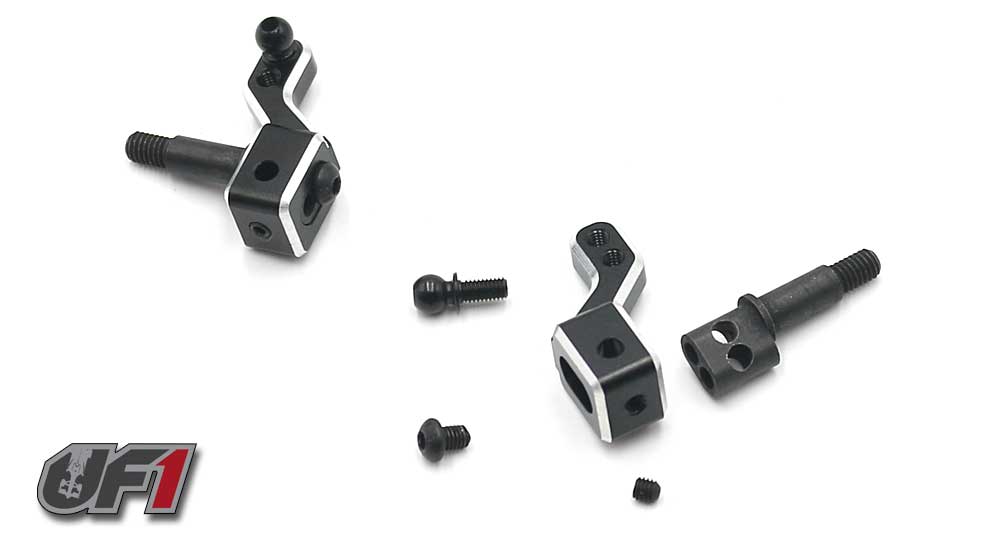
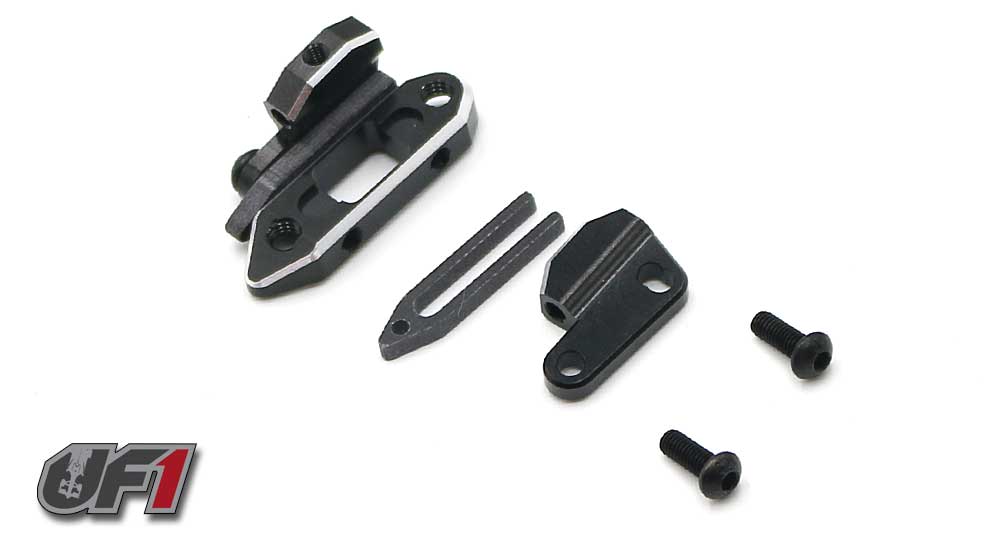
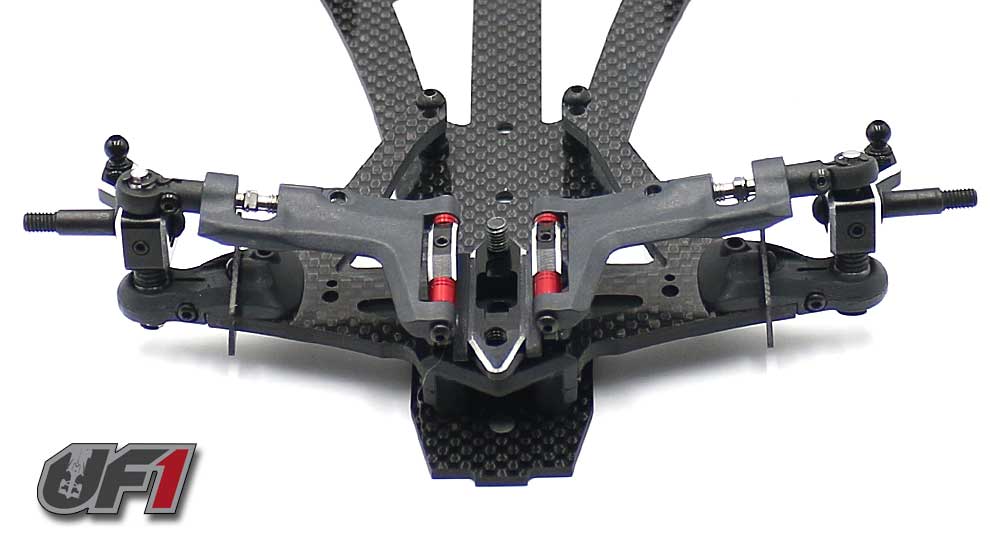
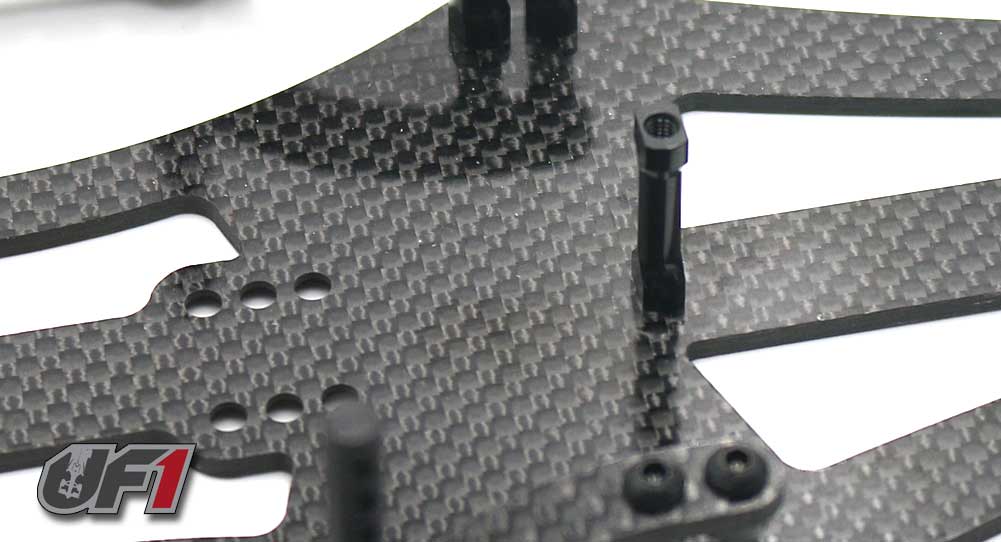
The first actual step in the FX18 build is to assemble the rear center suspension pivot. Include the two red washers (1mm and 2mm) and add a drop of blue threadlocker to keep the ballstud in place.
Insert the M2x6mm screw into the main pivot, but don’t tighten just yet.
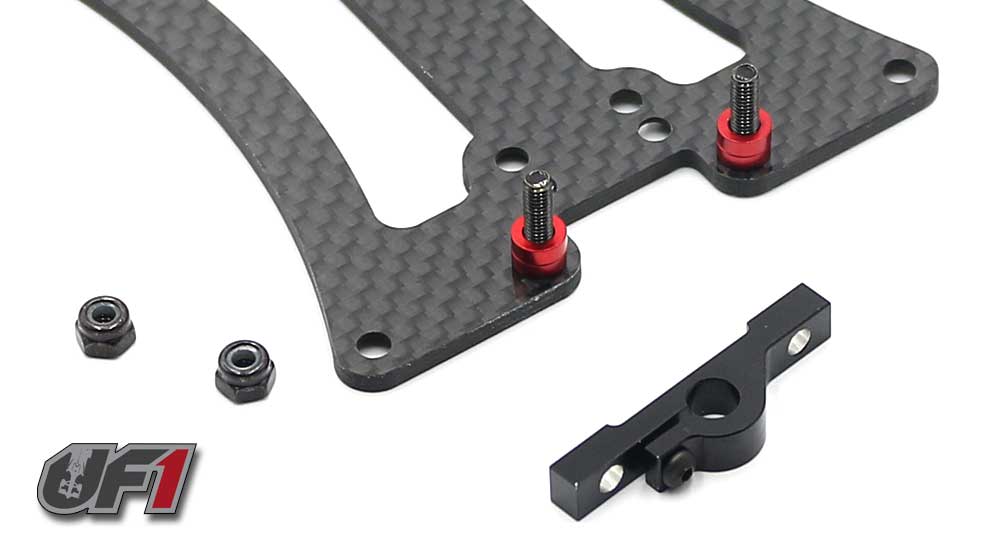
Attach the main pivot to the main chassis. Don’t forget the 2 red shims on both sides. Lock in place with the M3 locknuts.
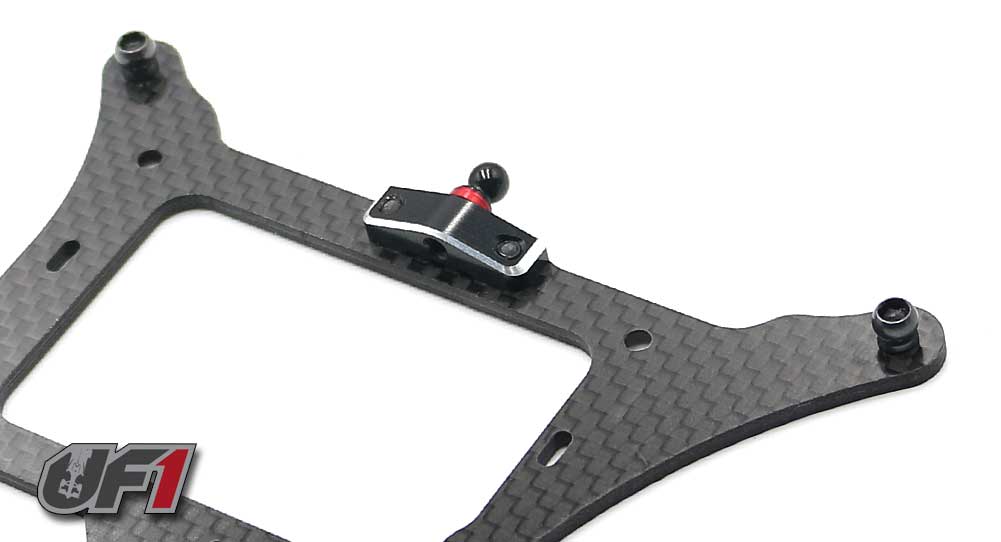
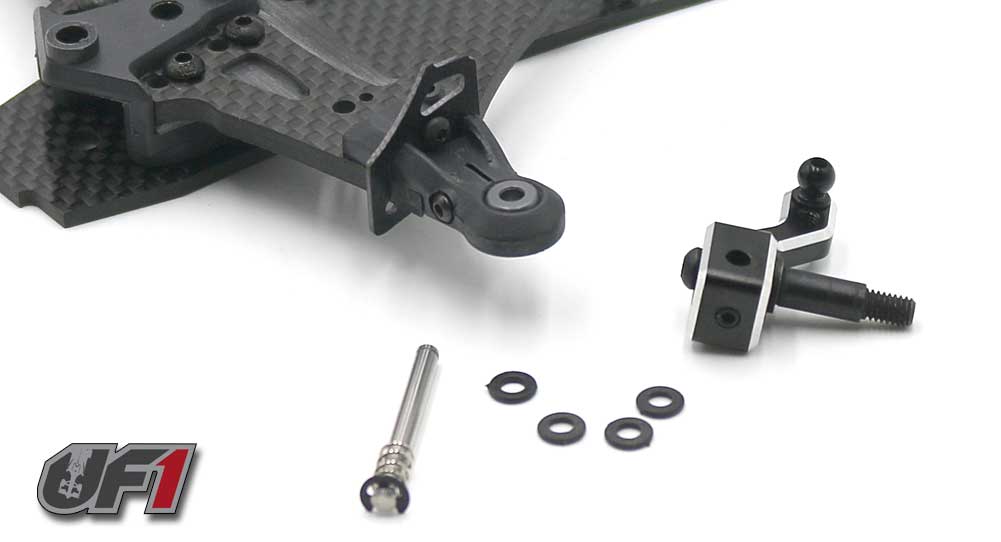
Attach the pivot ball to the lower rear pod. A small dab of threadlocker here is suggested.

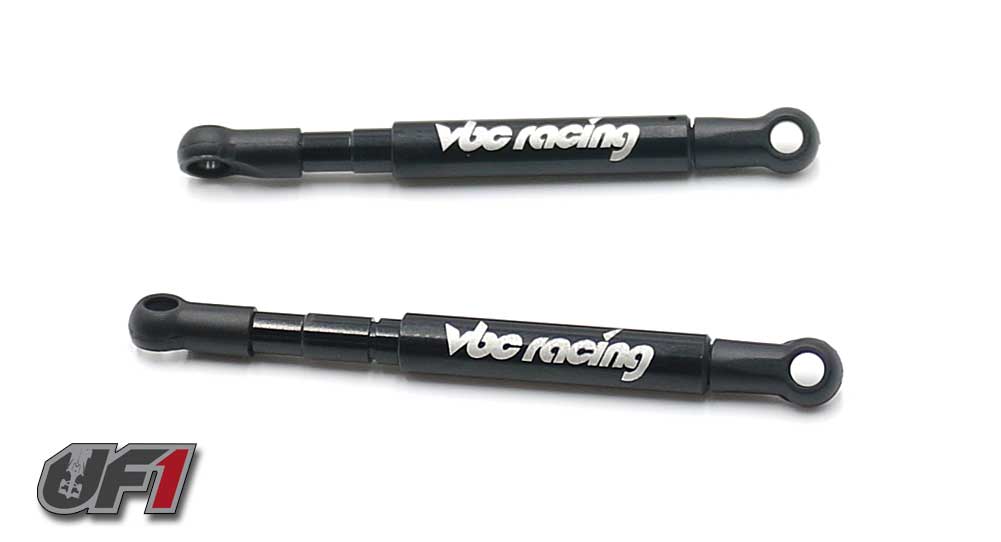
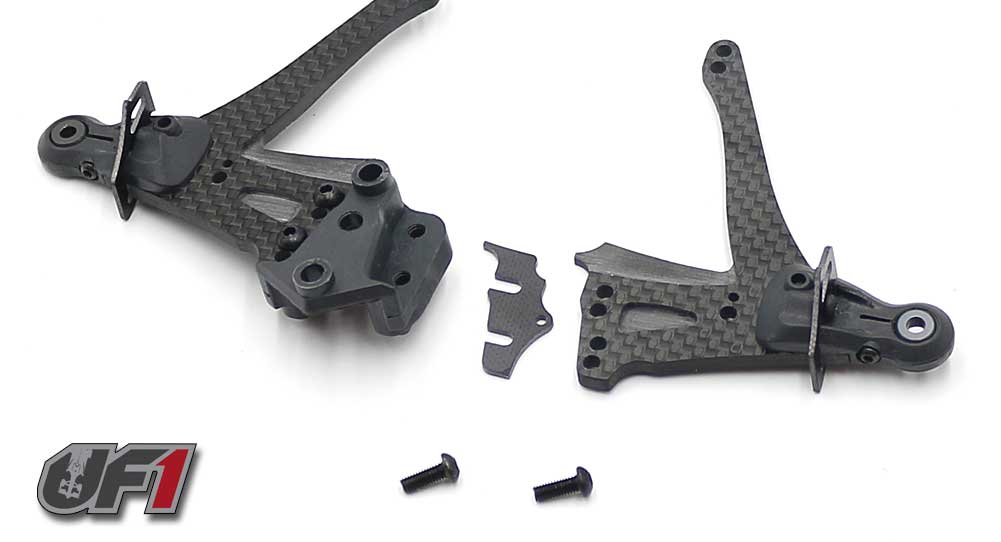
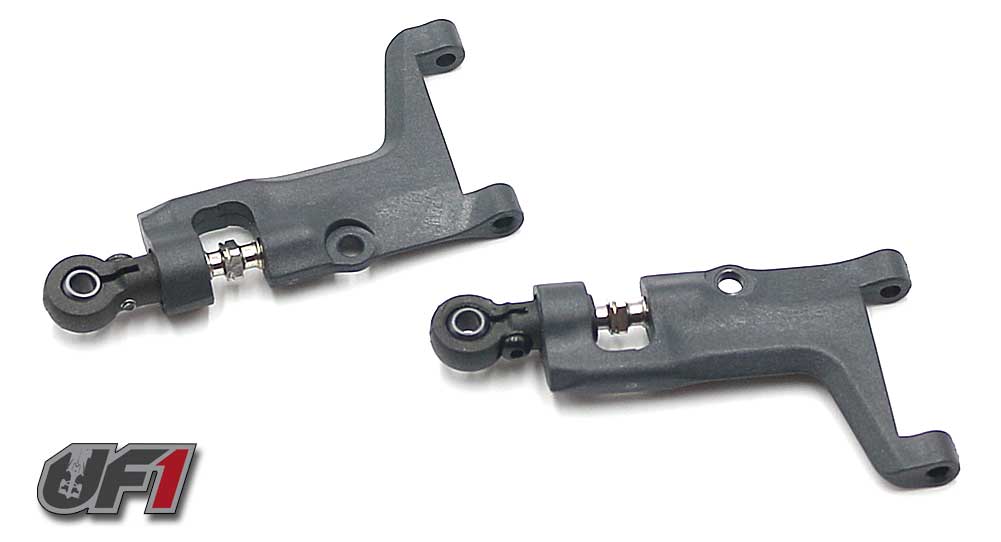
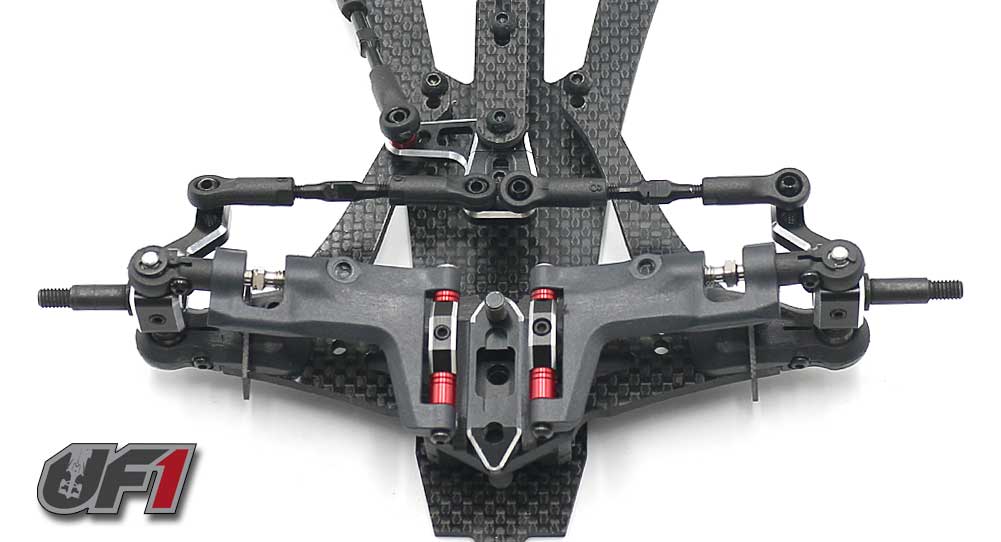
Build a pair of side links. Pay close attention to the direction of the links when inserting the screws (see manual).
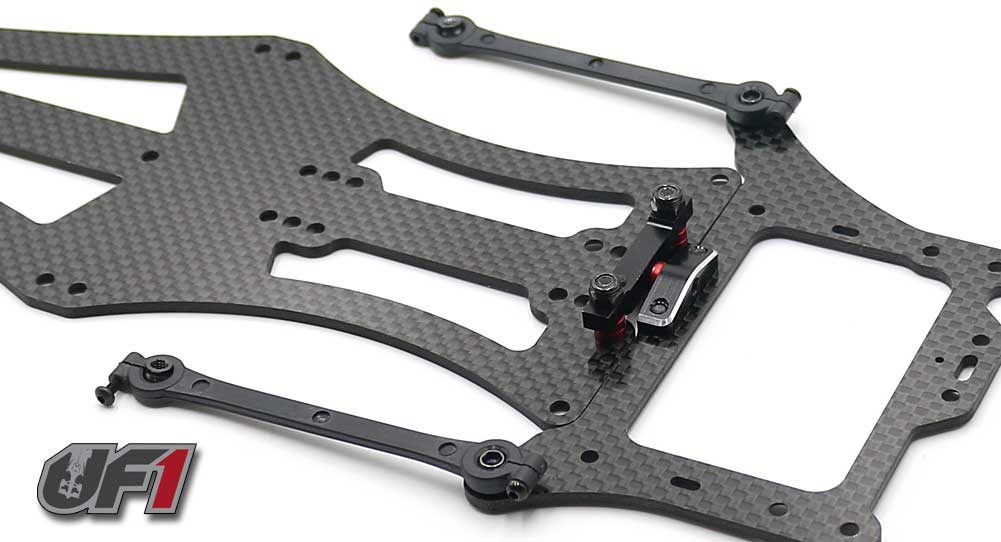
Slip the ball stud on the lower rear pod into the pivot on the main chassis. Tighten down the main pivot screw until it is snug around the pivot ball.
Attach the left and right aluminum motor mounts. Blue threadlocker is suggested here.
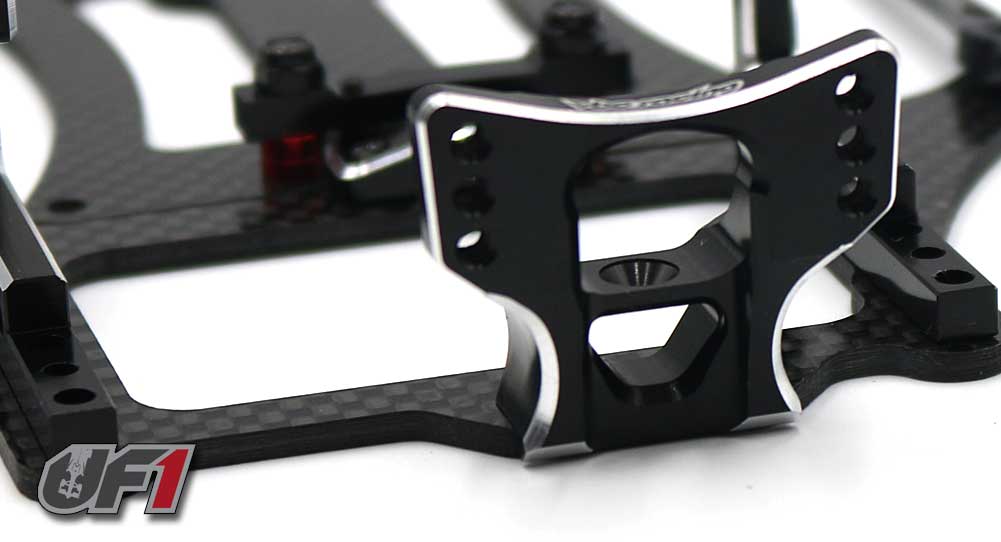
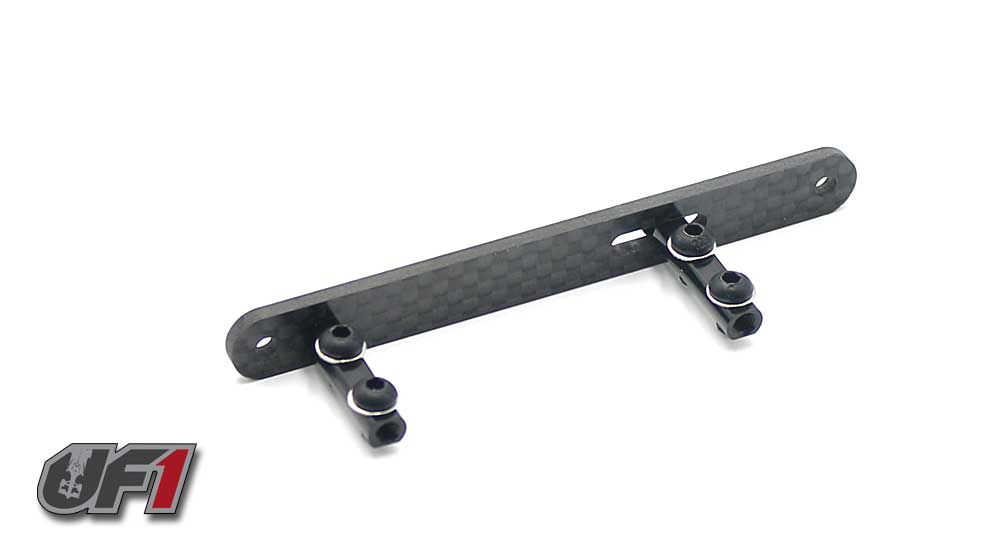
Attach the rear wing mount base. Use a dab of blue threadlocker here as well.
Attach the short, 14mm aluminum standoffs. Blue threadlocker here.
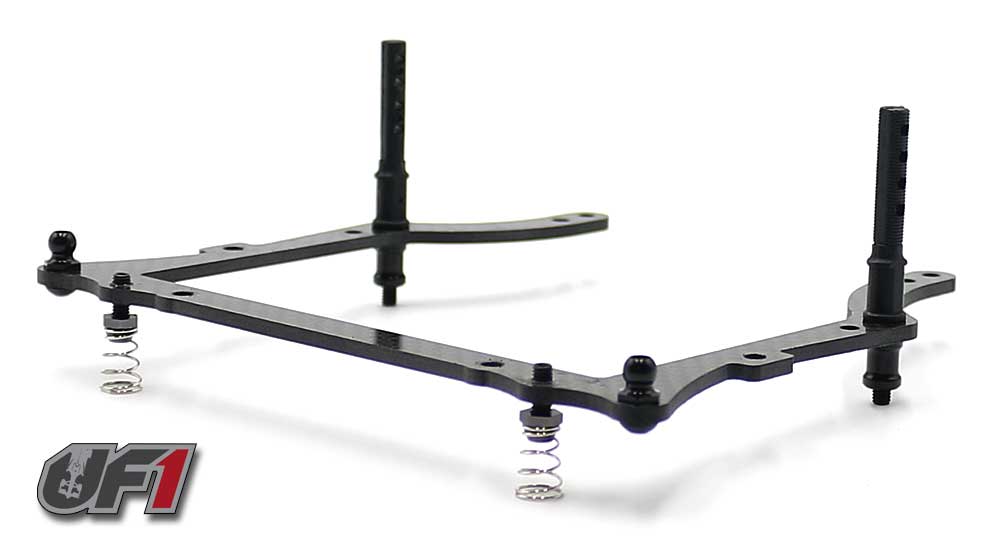
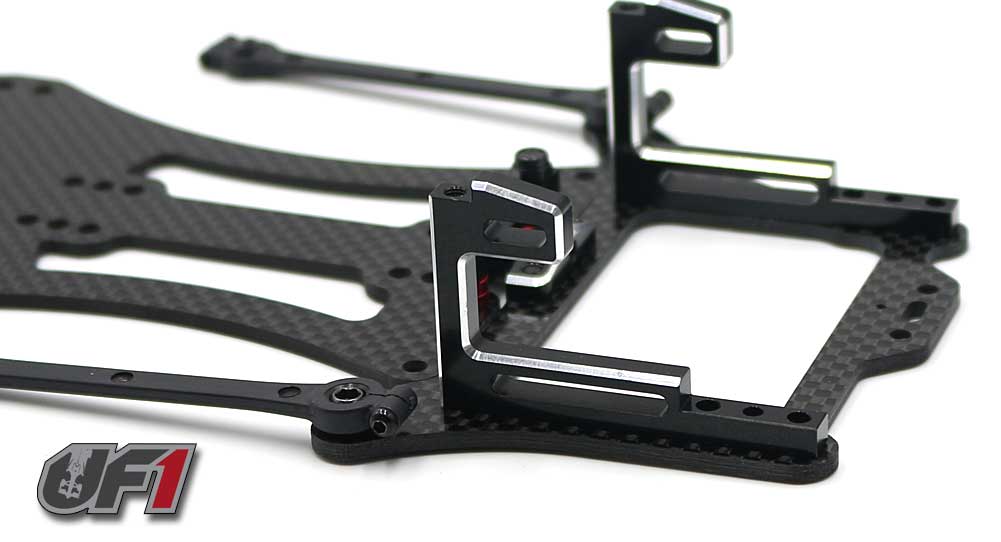
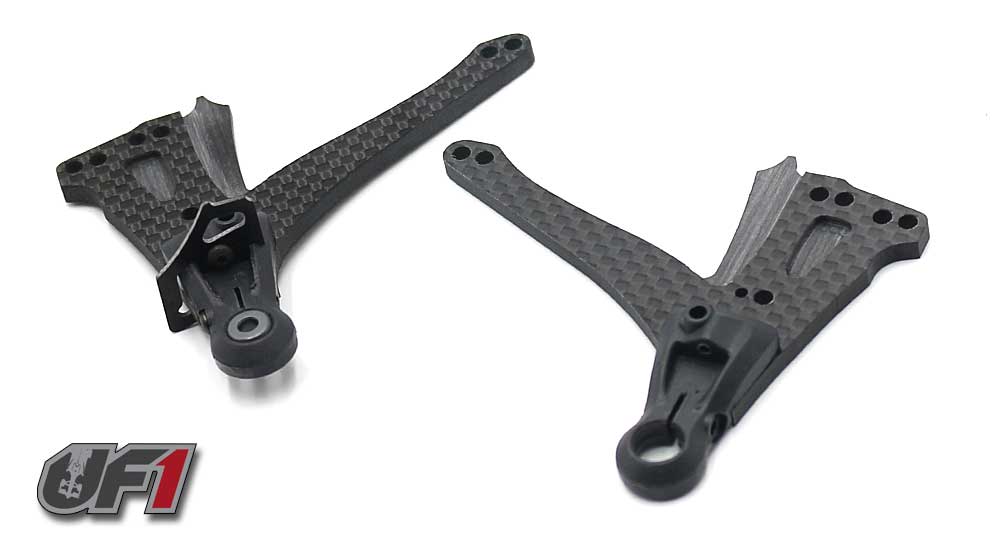
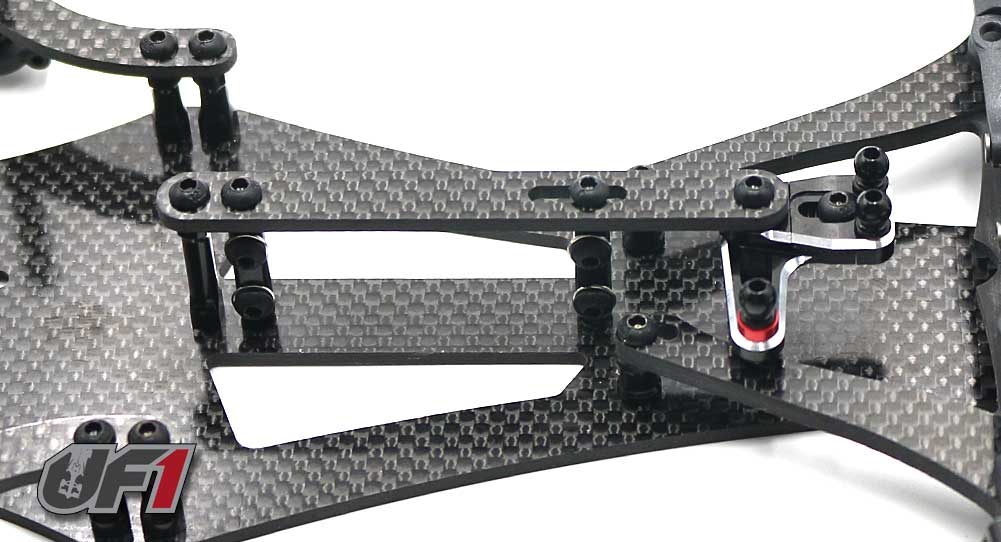
Time to build the upper deck. There are multiple pieces to this build.
Insert the M3x22 setscrews into the body mounts, then thread those through the upper deck and into the aluminum lower arm supports (note location on the upper deck).
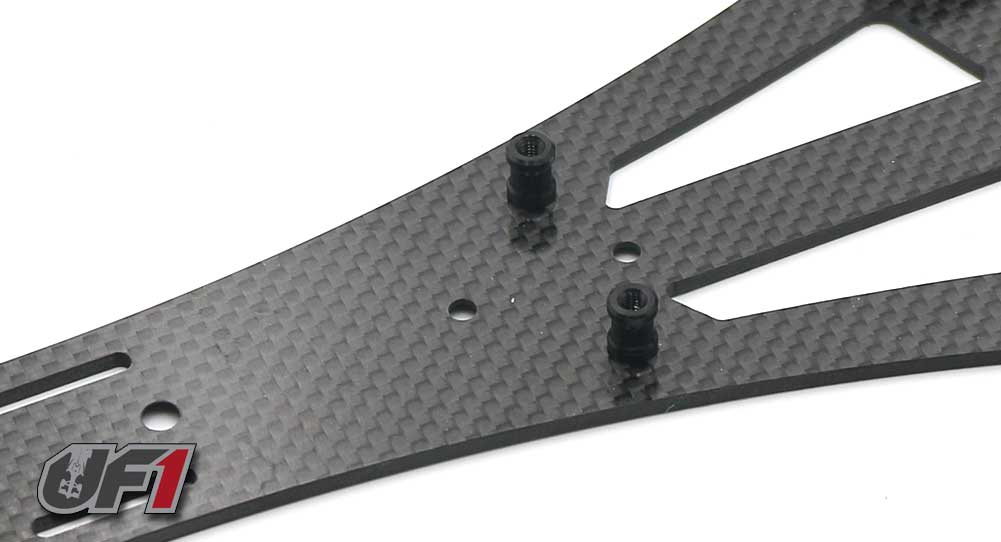
Attach the then ball nuts to the upper deck. Blue threadlocker here.
Feed the M3x10mm setscrew through the upper deck, then attach the side spring retainer. Pop the side spring on, small side up.
NOTE: the M3 setscrews are slightly larger than the holes in the upper deck. I suggest adding a lubricant to the setscrews (Chapstick works great) prior to screwing them in.
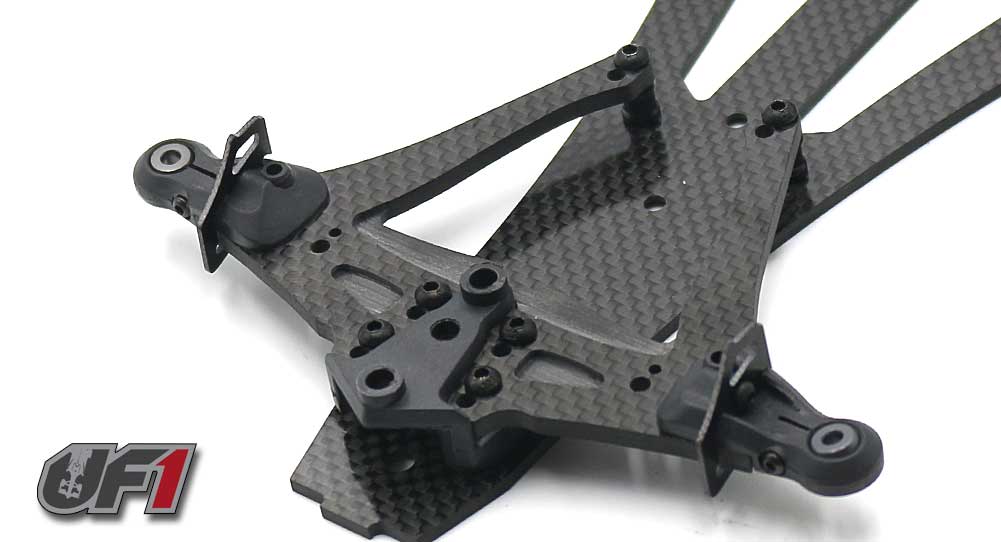
Attach the 4 14mm aluminum standoffs to the chassis. Blue threadlocker here.
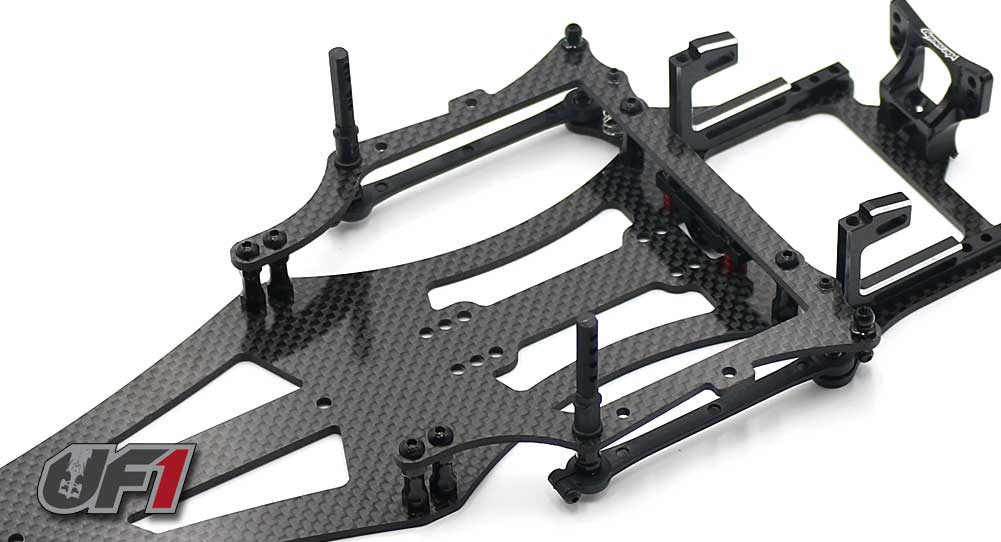
Attach the top deck to the chassis. There are 6 attachment points that will require blue threadlocker (those into the aluminum standoffs). You’ll also need to thread the front part of the side links onto the setscrew at the body mount.
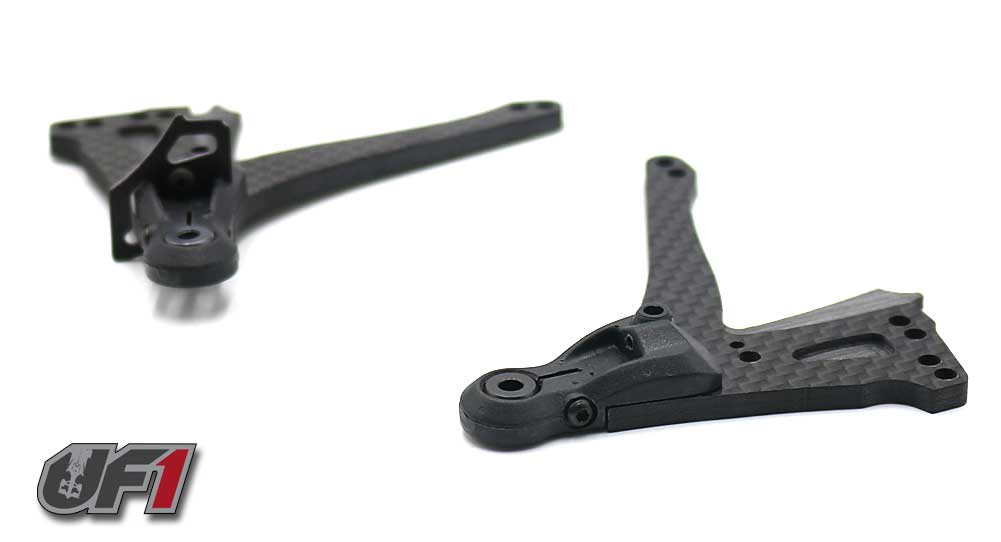
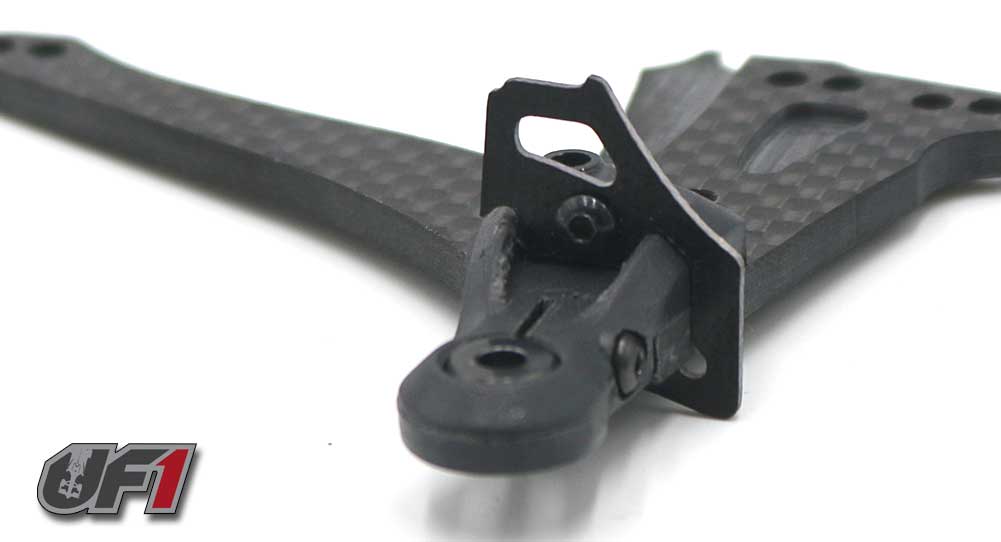
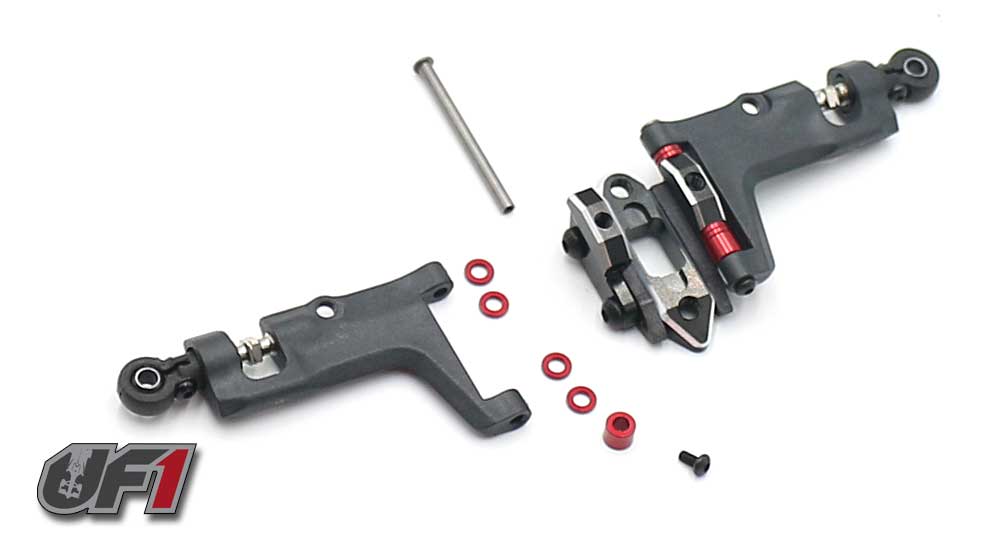
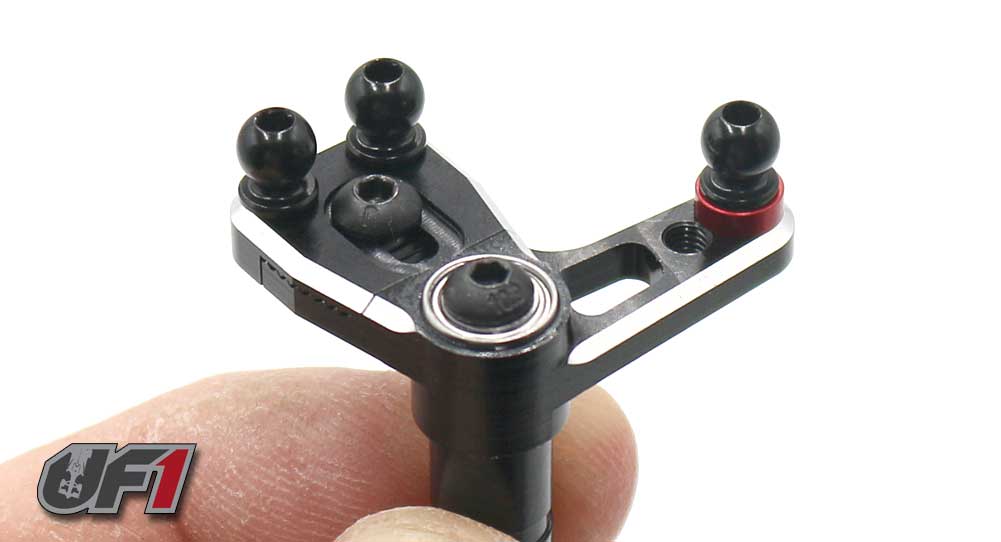
Assemble the upper pod. Blue threadlocker is suggested at all 3 mount points. Note the orientation of the carbon mount.
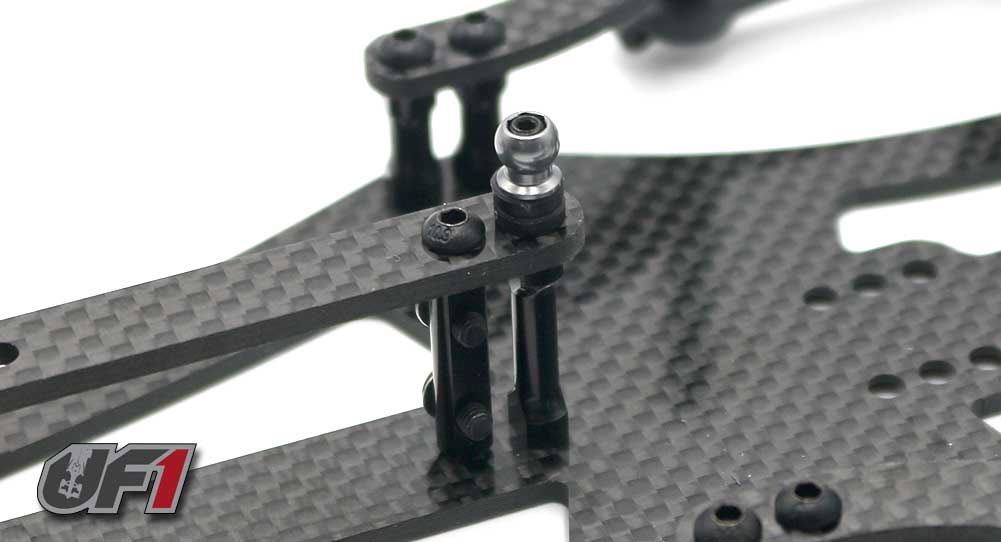
Build the side dampers. The track you run on will discern what damper fluid to use. If you’re not sure at this point, build them dry for now.
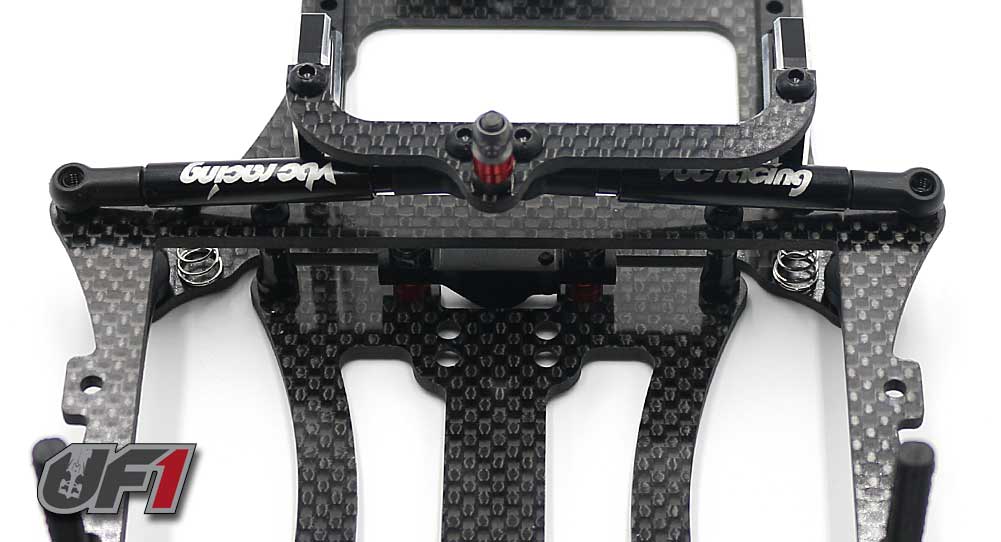
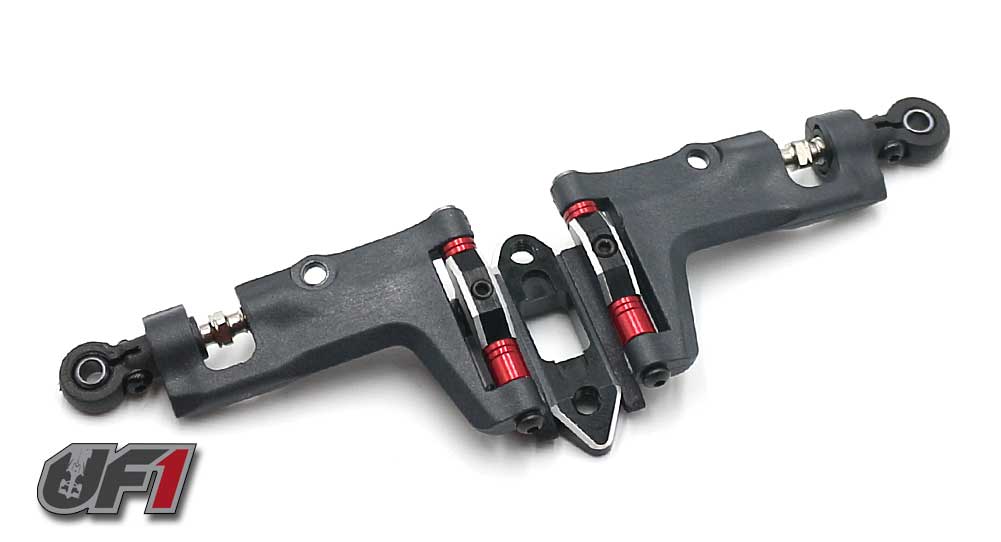
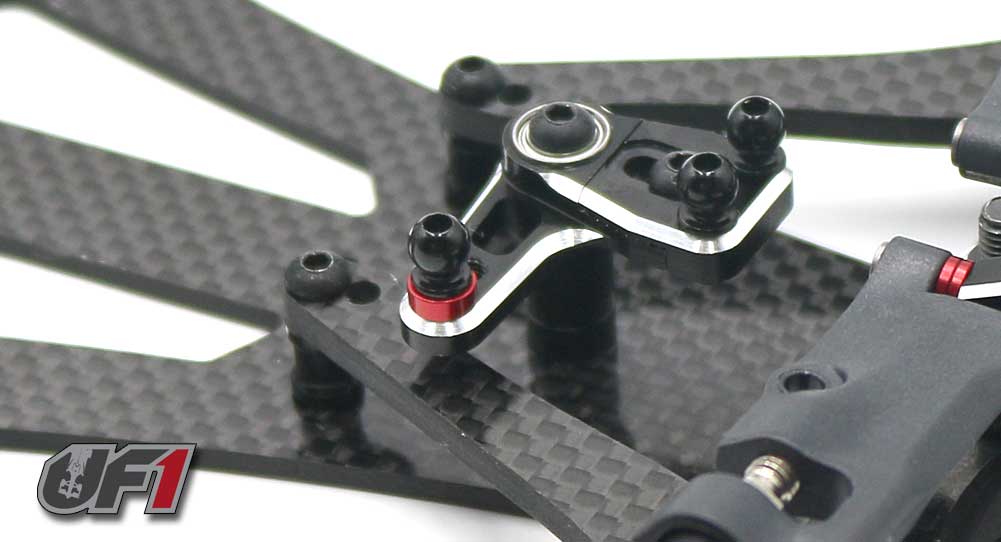
Attach the upper deck to the chassis (don’t forget the blue threadlocker), then snap the side dampers to the mounting points as shown.
You may want to swivel the rear suspension at this point to make sure everything is smooth.
Apply a small amount of clear grease to one side of the diff ring and press onto the rear axle. The grease will help keep the ring in place.
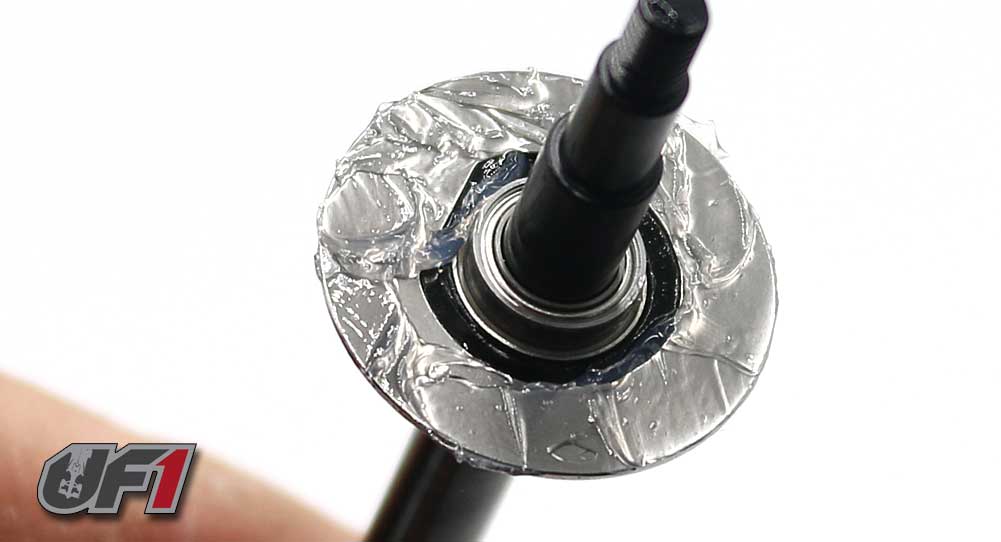
Slide one of the 1/4″ bearings into place. Add a liberal amount of diff lube to the diff plate.
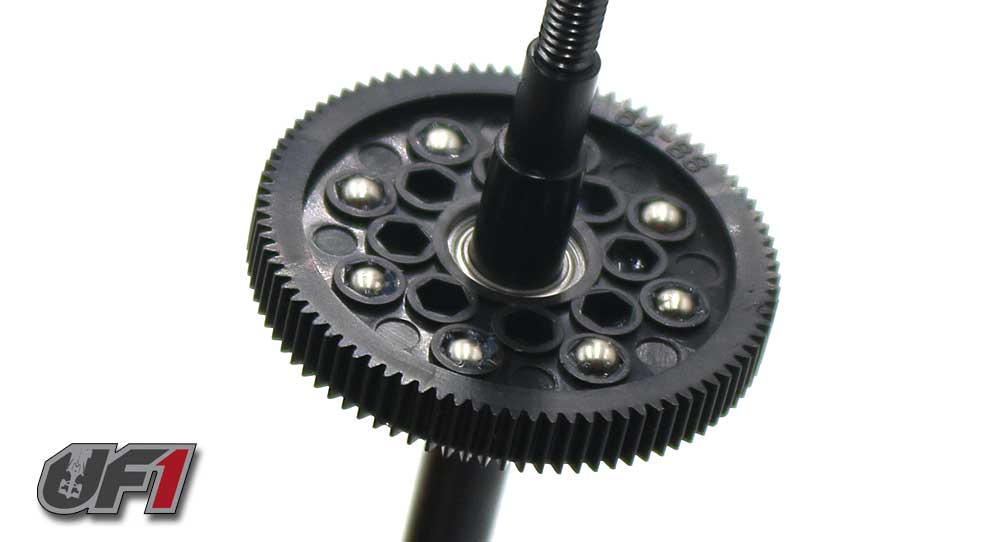
Slip the diff gear into place, then press a differential ball into the holes as shown. The grease from the ring will help coat the balls.

Assemble the diff hub; press a 1/4″ bearing into the opening followed by the diff ring and a liberal amount of grease.
Slide the diff hub onto the rear axle and set aside.
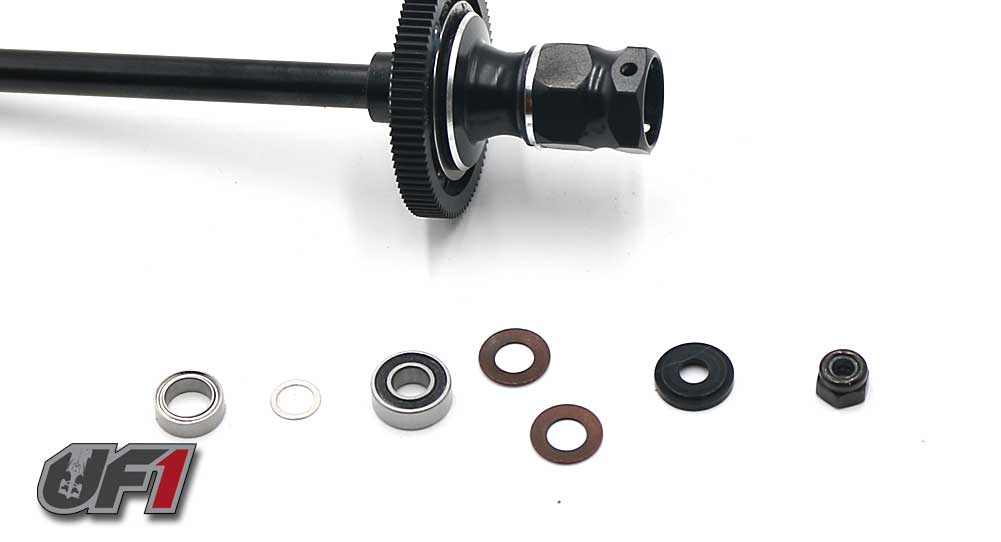
You will be sliding the following parts down into the hub to keep it all together; 1/4″ bearing, spacer, 5x11mm bearing, bevelled washers (facing each other – see manual), thrust washer and finally the M4 locknut.
Carefully slide all of these parts down into the aluminum hub, making sure everything seats correctly. Tighten down the M4 locknut until you can barely move the spur gear with your thumb, then tighten down 1/16 of a turn more. That should be a good setting to start with.
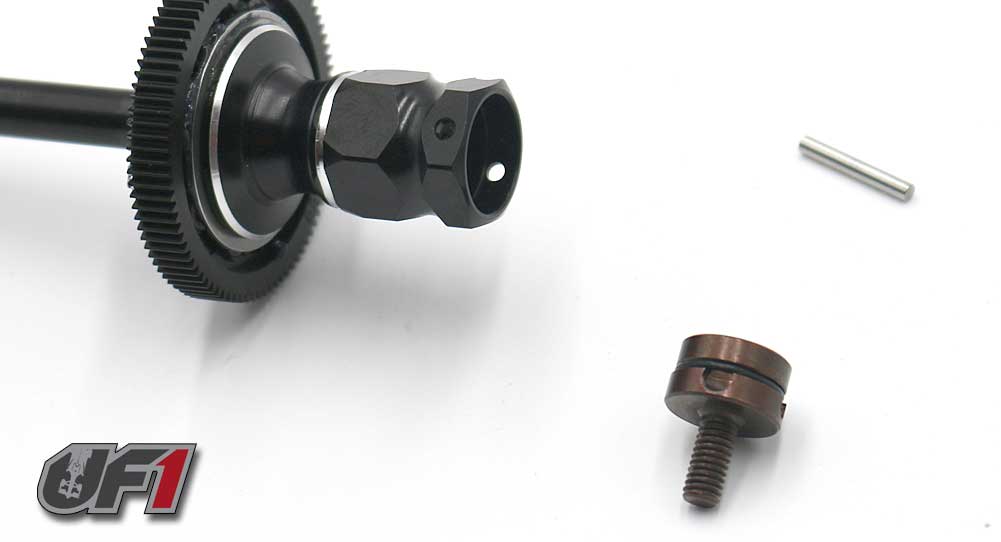
Slip the small o-ring over the differential cap, then slide that assembly into the aluminum hub. Press the pin through both assemblies; the o-ring will help keep the pin in place.
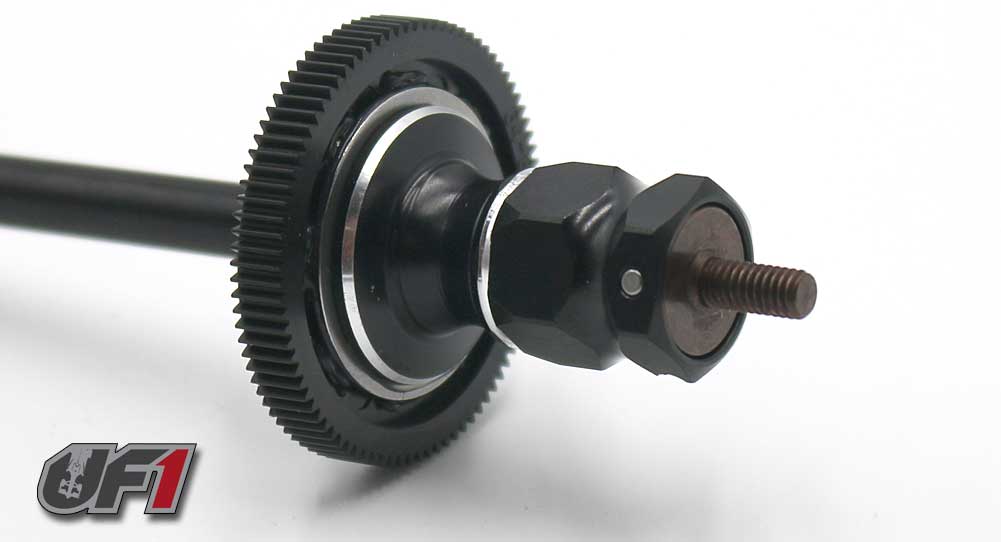
This is what your final assembly should look like.
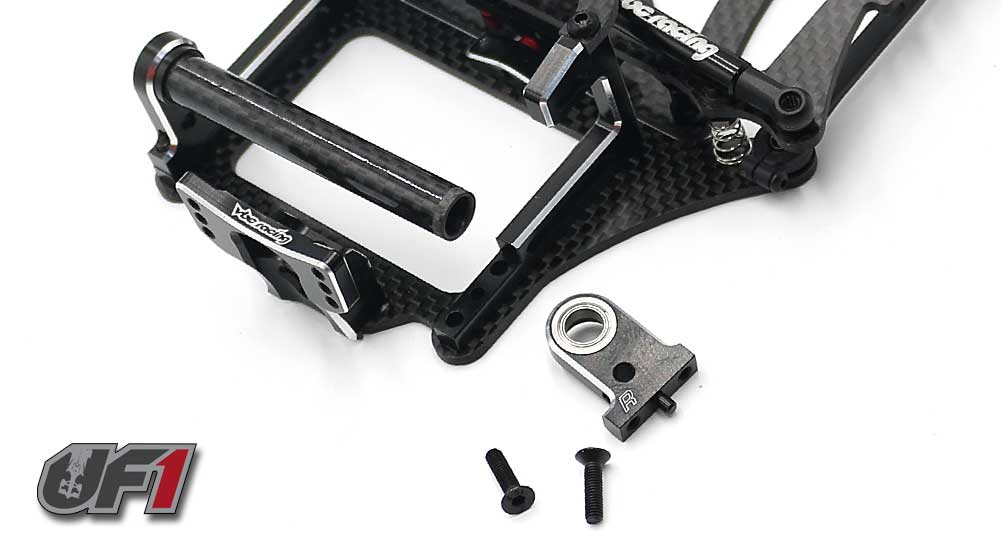
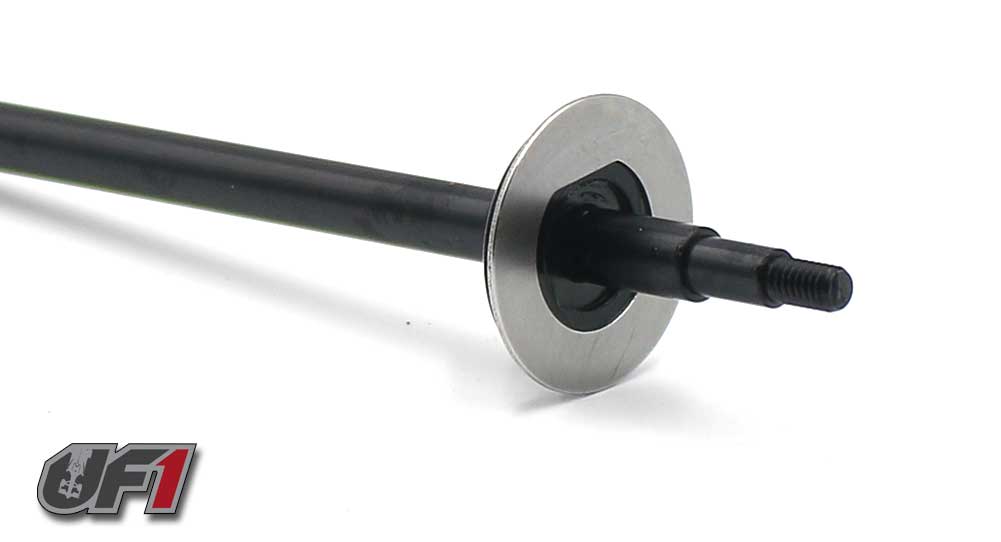
Press a 1/4″ bearing into each rear hub axle housing.
Attach the 2 rear hub axle housings to the motor mount (blue threadlocker here), capturing the carbon tube between them. Note the orientation of the housings.
You can also add the 1mm spacers under the rear hub axle housings to adjust ride height.
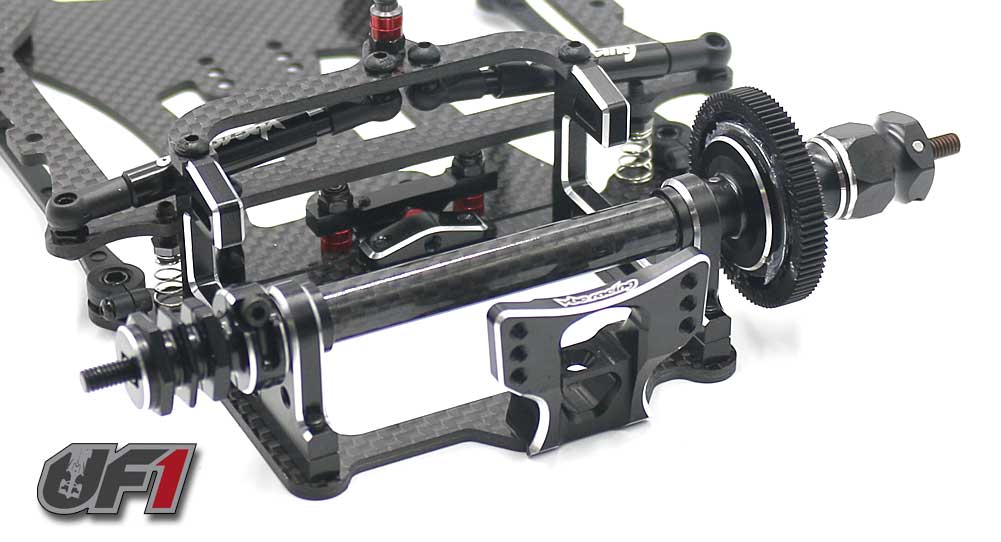
Slide the rear axle through into place. Slip the left aluminum wheel hub onto the axle and pinch it with the 2 M2.5x8mm screws. Leave a teeny tiny amount of room between the hub and the motor mount; too tight and you’ll bind the rear axle.
On to the front suspension. We’re working with the front axles; assemble them as shown using blue threadlocker to keep the screws in place.
Do not tighten the setscrew just yet. We’ll be doing that in step 33.
The manual has us building them with a trailing axle. The FX18 also has the option to be built with an inline axle (see the difference between the two here: http://www.competitionx.com/rc-tuning-guide/)
Attach the plastic front lower arm pivot ball mount to the carbon arm (note the orientation of the carbon arm). Do not overtighten the screw going into the plastic.
The arm on the left is a complete assembly for visual purposes at this point.
Press the pivot ball into the arm, then insert the M2x10mm screw and snug it down. It only need to keep the ball from falling out. Too tight and you will hinder the movement of the ball.
Carefully press the fiberglass steering limiter into place. It seems quite fragile so extra care must be taken to not snap it. Once in place, use the M2x6mm screw to hold it.
Attach the left and right arm assemblies to the front bulkhead. Use the 1.5mm spacers to adjust the ride height.
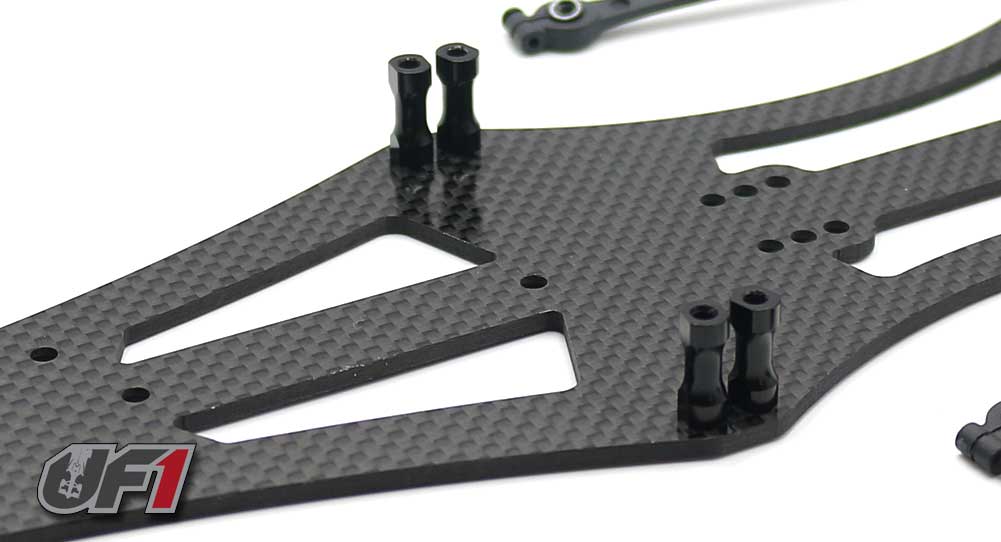
Attach the pair of V2 lower arm support mounts to the chassis, using blue threadlocker on the screws.
Attach the front arm assembly to the chassis. A dab of blue threadlocker is suggested on the M3x8mm screws.
Press an e-clip onto one end of both front kingpins, then slide the suspension spring in place. Slide the kingpin assembly up through the bottom arm, followed by either 2 T2 (2mm) spacers or 4 T1 (1mm) spacers.
If you’re like me and didn’t see any of the T2 spacers, it’s because they’re buried in a later step bag. I didn’t see them so I went with the 4 1mm spacers.
Once you’re done with your spacers, slip the steering arm onto the kingpin.
The manual suggests adding 2 more 1mm spacers on top, but let me just save you from TONS of grief – hold off on this for now. We’ll install them later.
Assemble the front caster mount. Blue threadlocker here.
Assemble a pair of upper arms. I would HIGHLY suggest finding a turnbuckle wrench before starting this step, preferably a thin-profile wrench.
Pre-fit the upper arm pins into the aluminum caster mount prior to assembly. One hole in the caster mount was undersized and required me to drill it out a little.
Attach the upper arms to the caster mount. The kit setting of 2mm x 6mm spacing is a good start.
Your final upper arm assembly should look like this when completed. Make sure both front arms swivel smoothly.
Add your 2 1mm shims from Step 33, then slide the upper arm assembly into place. Capture at the kingpins with the small e-clips.
You can tighten down the set screws from Step 33 as well.
Build your steering arm. Note the adjustability of the arm; the default setting makes for the least responsive steering setup. You can lengthen the arm in 1mm increments to adjust responsiveness.
Add the 3 ball ends, using blue threadlocker to keep them in place.
Press another 5×8 bearing into the bottom of the steering and slip the steering post into place.
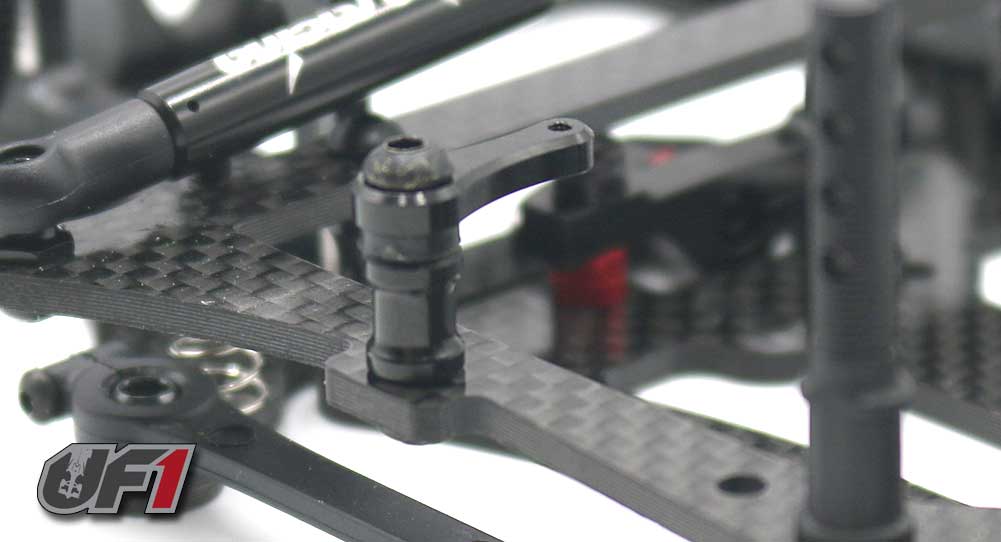
Attach the steering post assembly to the chassis. Blue threadlocker here.
Attach the servo mount post to the chassis. Blue threadlocker here.
Build the servo mount. Blue threadlocker into the aluminum posts is suggested.
Attach the servo mount to the chassis. Blue threadlocker is suggested.
The instructions don’t call for a screw into the standoff in the center of the chassis, but I put one there to keep everything aligned. We’ll be swapping that out in Step 49.
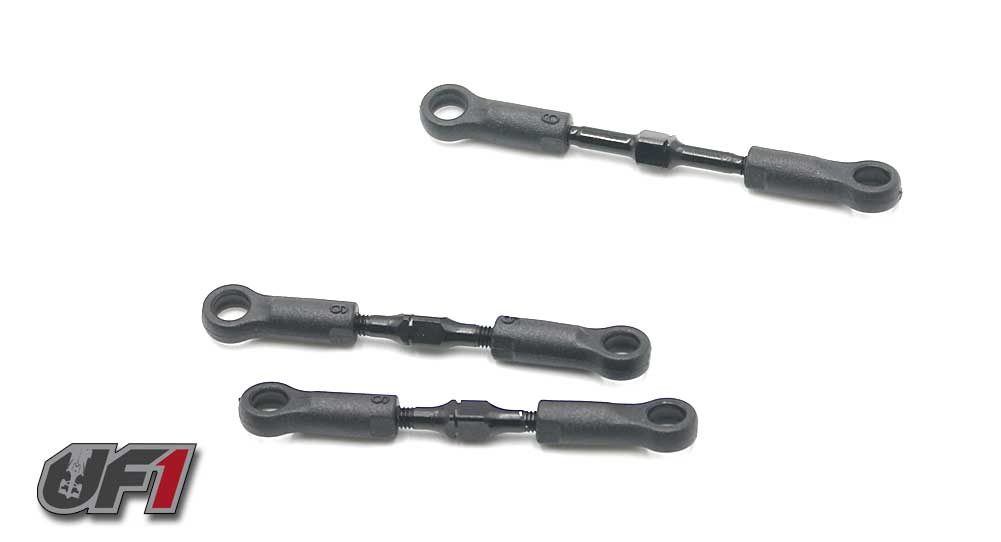
Build 3 turnbuckles; 2 steering, 1 draglink.
Pop the turnbuckles into place. The lengths should be really close; 0° of toe.
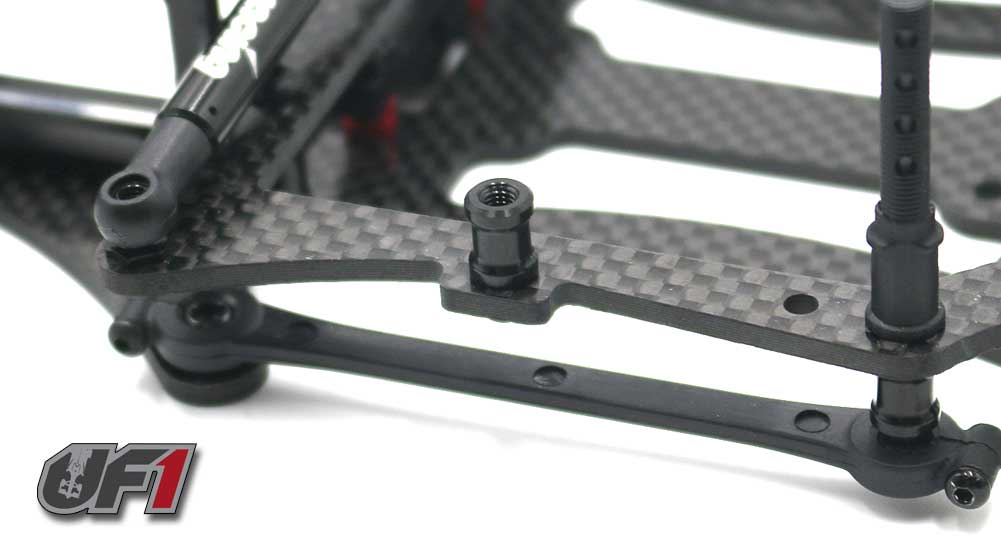
Install the lower arm support mounts to the upper deck. Blue threadlocker here.
Slip the T2 (2mm) spacer and battery trap in place, then secure with the M3x8mm screw. A very light dab of blue threadlocker is suggested here.
Thread the M3x16mm screw through the servo mount and into the standoff (blue threadlocker suggested). Add a pair of 2mm spacers followed by the ball connector.
This will be the forward mounting point for our center shock.
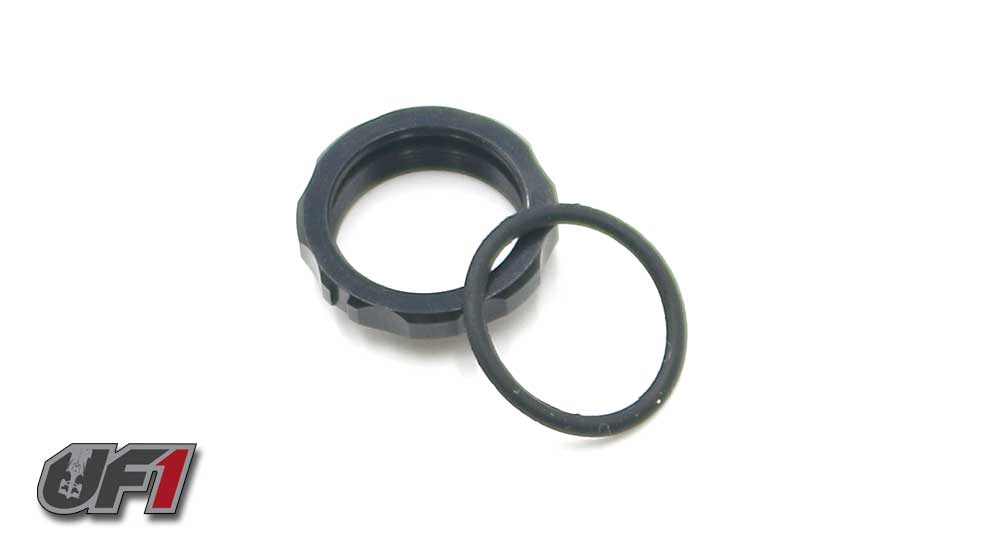
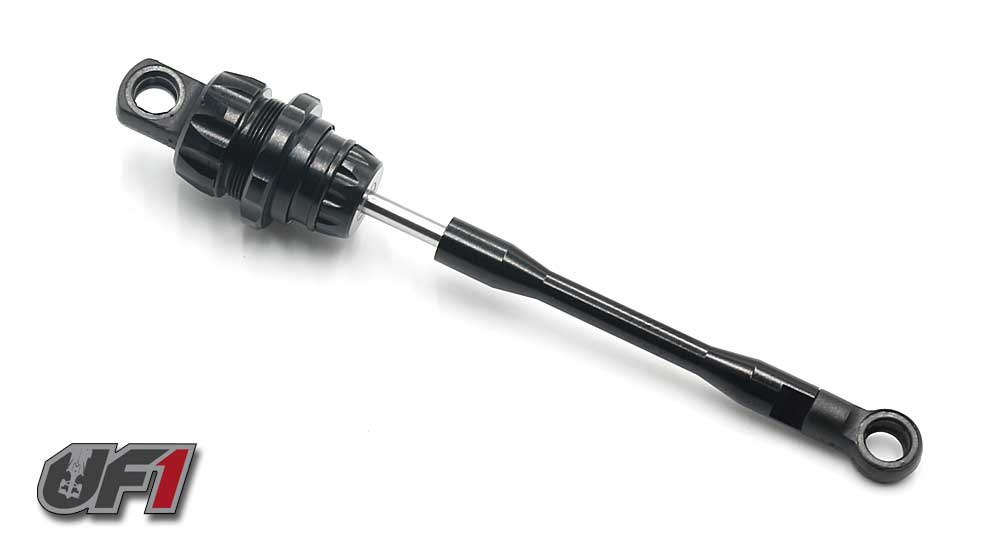
Insert the o-ring into the threaded collar. I like to do this up front in case I get any fluids on my fingers; that makes this installation a little harder to do.

Assemble the shock shaft; e-clip-piston-e-clip.
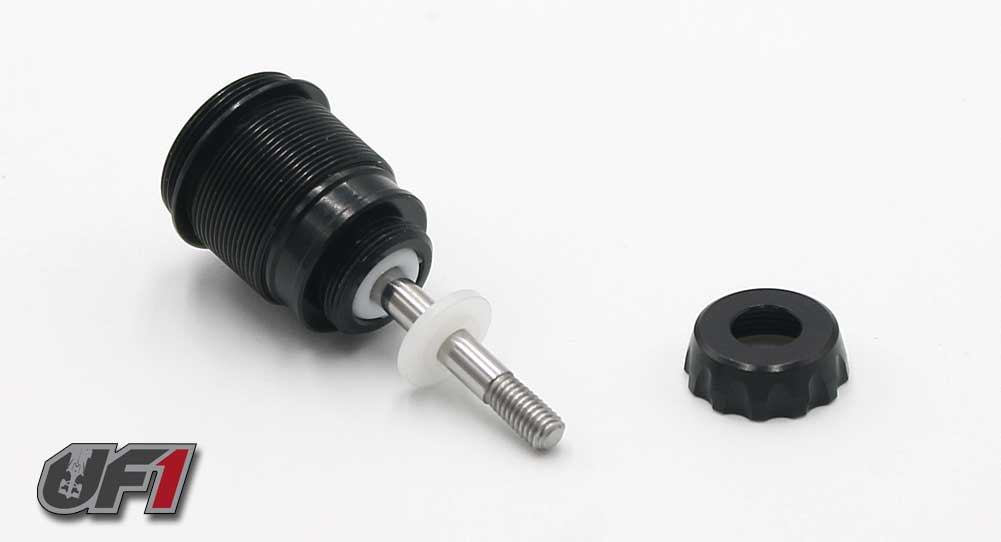
Slide the shock shaft assembly into the shock, the slide the o-ring and shaft cap into place. A light dab of shock fluid here is suggested to help lubricate the o-ring.
Once in place, thread the lower shock cap onto the shock body.
Attach the shock extender and lower shock eyelet.
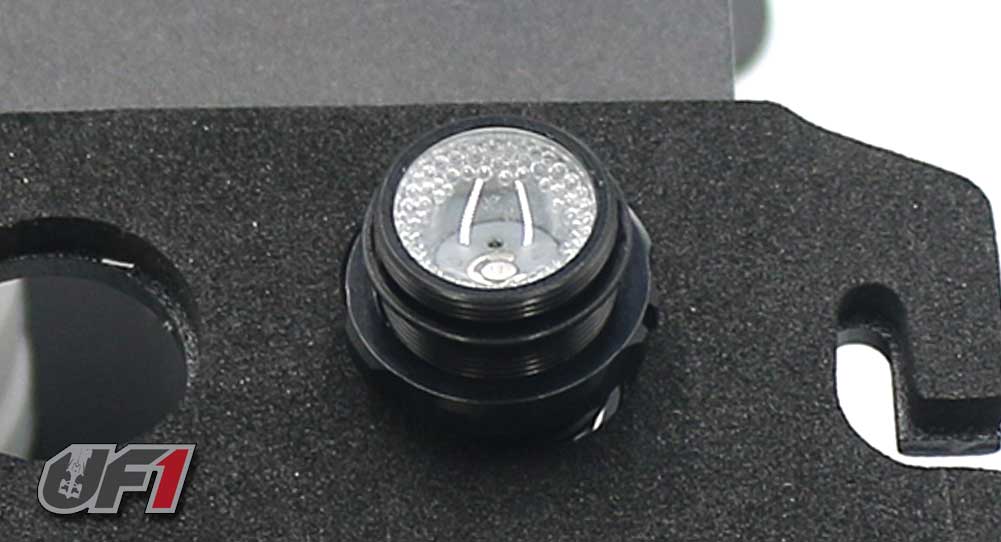
Fill the shock with fluid (designated by your track conditions). Carefully plunge the shock shaft up and down a few times to release any bubbles out from under the piston.
Set aside to allow all the bubbles to escape.
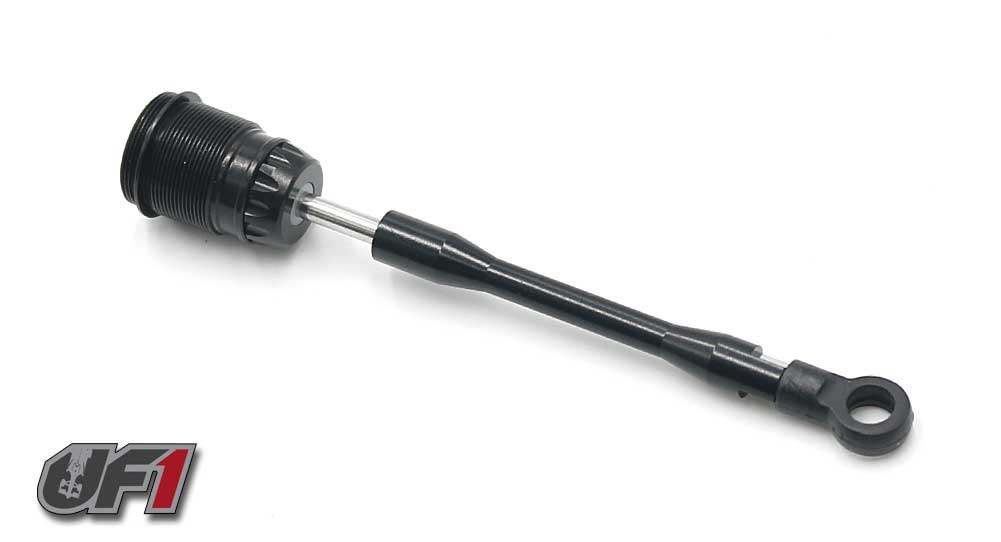
Once all the bubbles have escaped, carefully install the shock bladder followed by the shock top and threaded cap.
Slowly plunge the shock a couple times to make sure it compresses all the way.
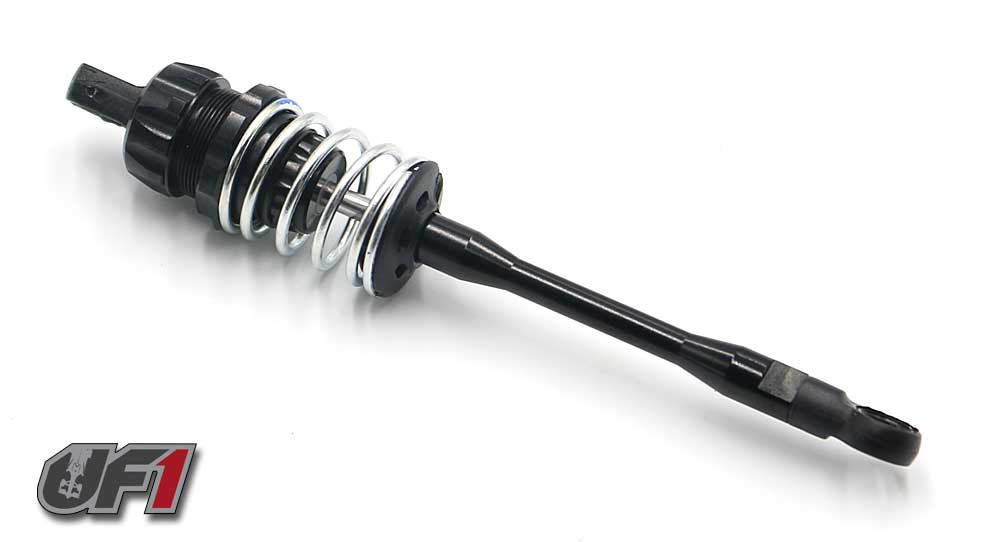
Thread the collar onto the shock, followed by the spring and lower spring retainer.
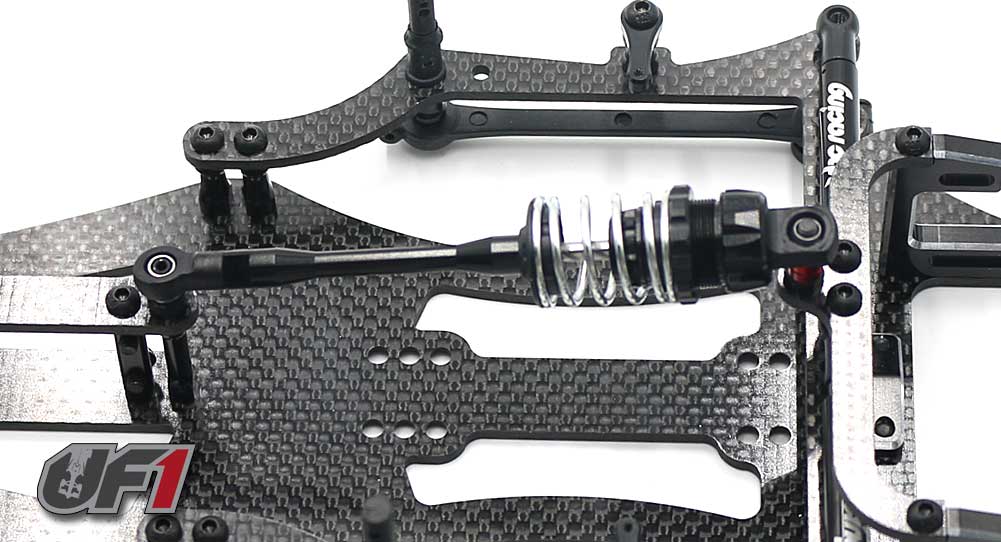
Pop the shock into place as shown.
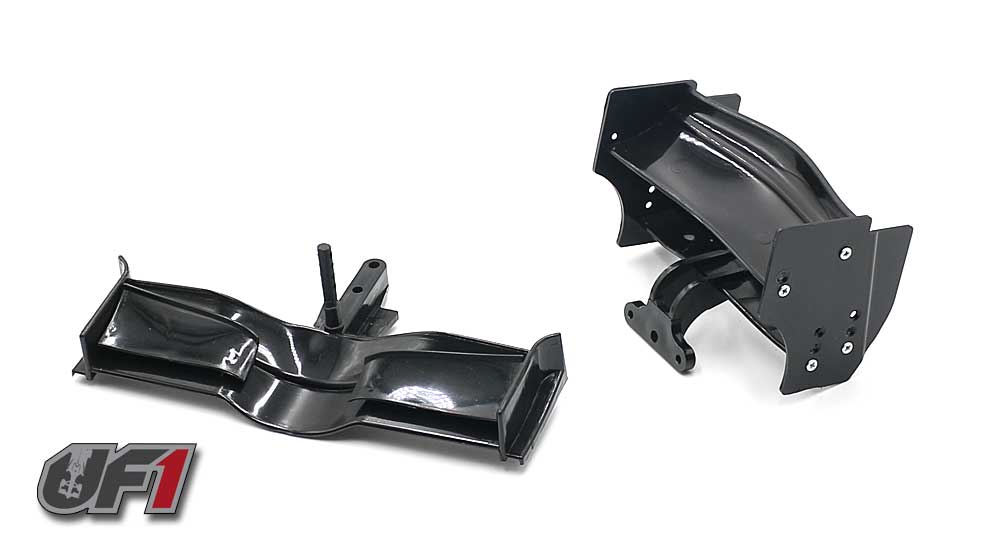
Assemble both the front and rear wings. The rear wing is adjustable, but build as shown to start.
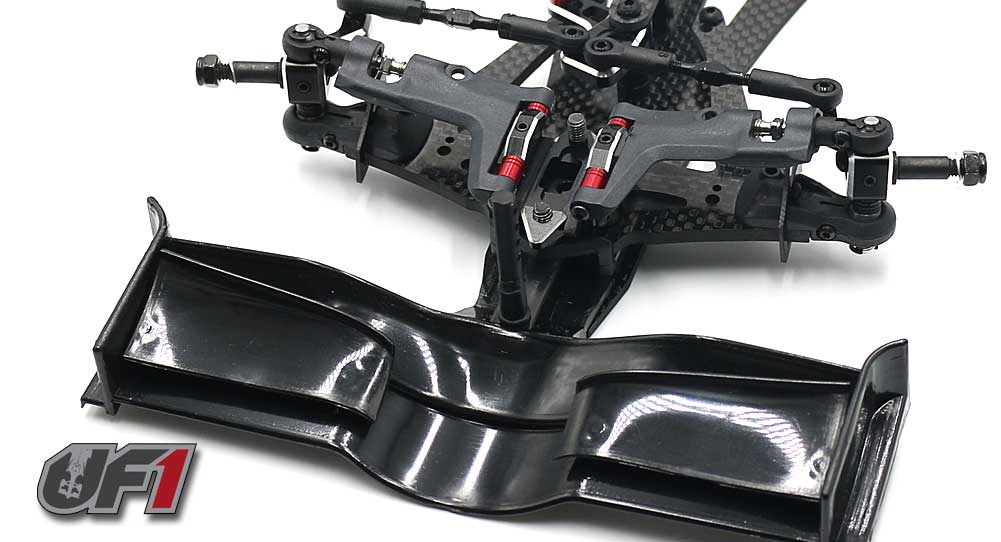
Attach the front wing using the M4x28mm screw to keep it in place.
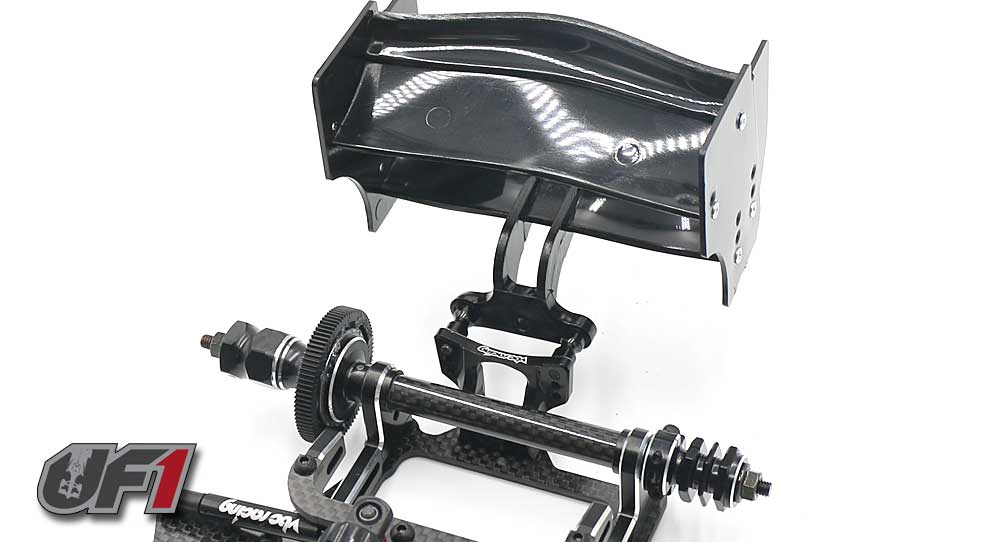
Attach the rear wing to the aluminum mount. If you have trouble doing so (you want the wing in a lower position), you can remove the wing mount, attach the wing and then re-attach the mount.
Nice job! I bet you can’t wait to get your VBC FX18 Lightning out on the track! Install your electronics, wheels and tires as well as your F1-inspired body and you’ll be ready to join us at the next UF1 event!